Men's classic vest pattern for a young man. How to cut a men's vest. DIY men's vests, photo
This is the first time I describe in such detail the process of creating a product from start to finish, it’s quite difficult, but interesting!
This material can be used as a complete mini-course on sewing a vest (not necessarily for men), or you can use only its fragments as an aid in performing individual operations.
For convenience, the material is divided into blocks:
DAY 1. Layout and decoration
DAY 2. Cutting and duplicating
DAY 3. Pockets and assembling the vest and lining
DAY 4: Attaching the Lining
DAY 5. Hinges and fittings
YOU WILL NEED (for size 54):
· 1.1 m wool fabric 1.5 m wide;
· 1.3 m of silk for lining 0.9 m wide;
· adhesive dublerin;
· 4 buttons;
· 1 buckle without pin, 2 cm wide.
AND:
· 1 m of calico for making a model;
· polyethylene for transferring the pattern from the pattern sheet;
· pen or marker;
· measuring tape, tailor's pins;
· tailor's chalk and washable marker;
· scissors for cutting and small scissors for needlework;
· ruler and pattern for allowances;
· iron;
· sewing machine needle, hand sewing needle, sewing thread, foot. 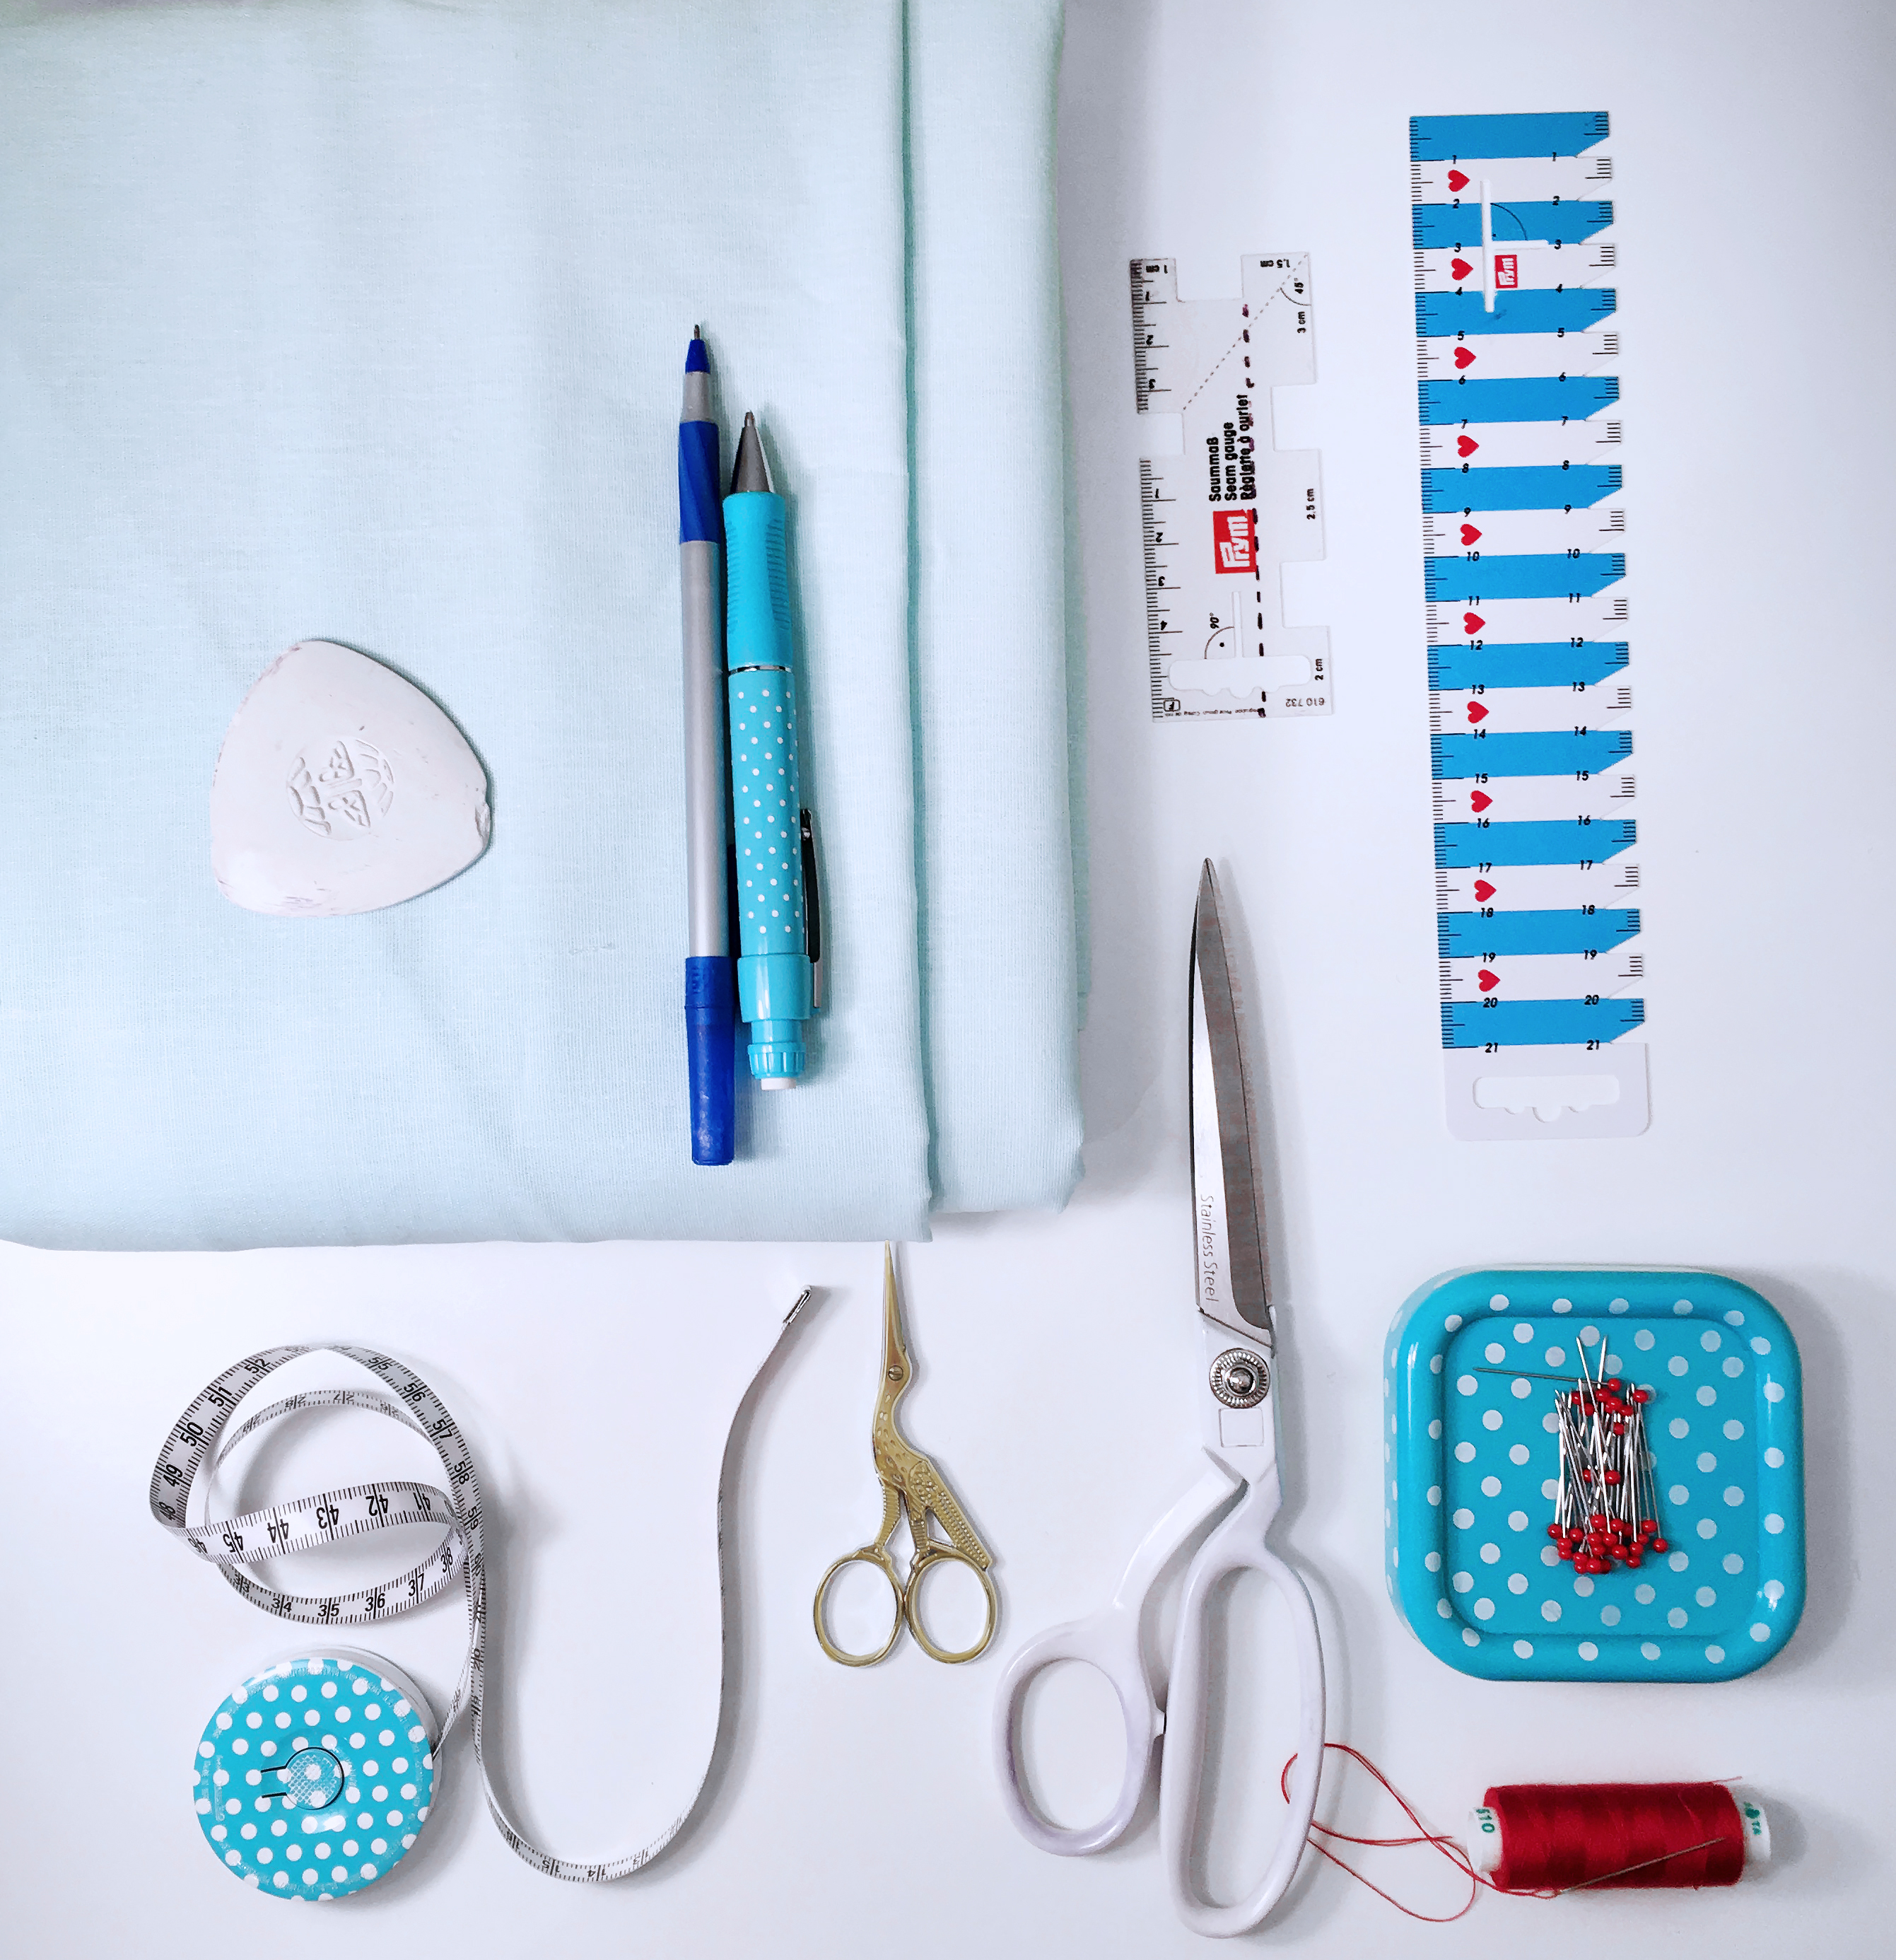
This master class shows how to make a vest using pattern 128A from Burda 09/2017.
Size 46−54
Pattern:
46, 48, 50, 52, 54
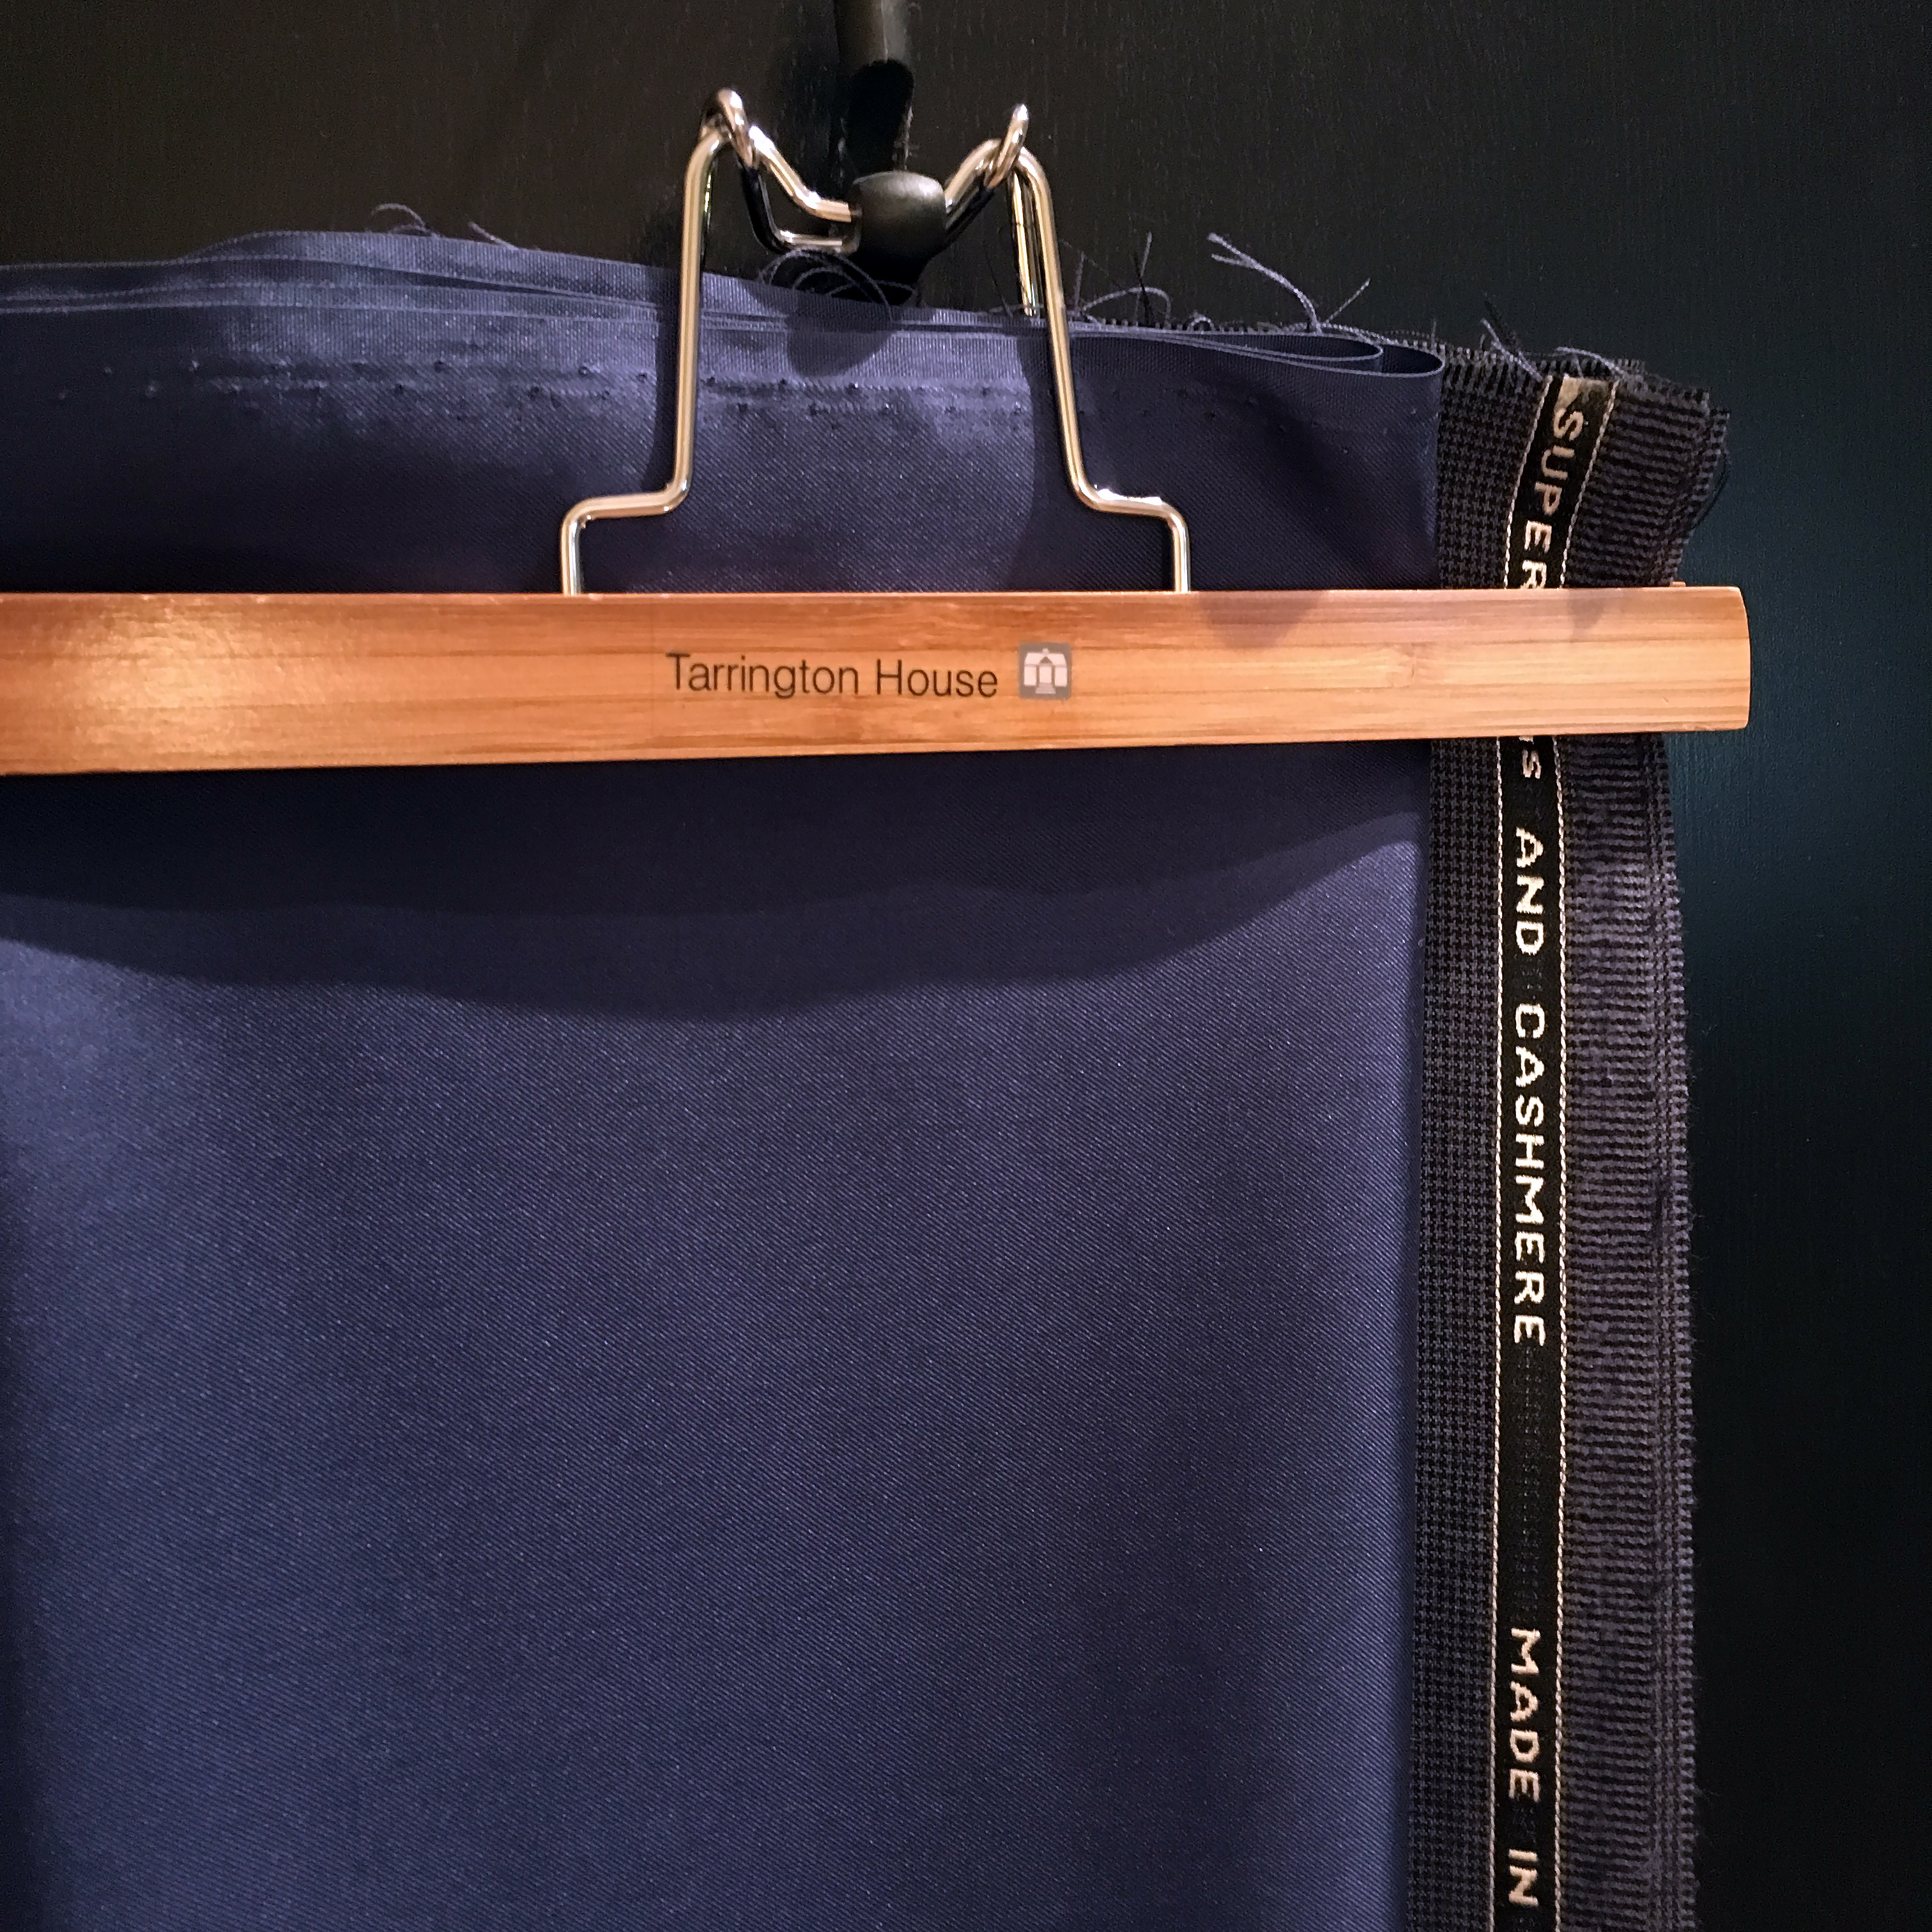
It's time! A dark blue vest with thin diagonal stripes, with two rows of formal buttons and a…
DAY 1. LAYOUT AND DECATING
Using polyethylene or tracing paper, copy the pattern details, mid-chest lines, lobar directions and registration marks. Transfer to mock-up fabric, allowing for allowances on the shoulder and side seams. No allowance is needed for the neckline, sides, armholes and bottom of the vest. Sew shoulder, relief and side seams. Try on and adjust the layout.
The vest was sewn for an asymmetrical figure with a protruding belly, so to pattern 54 I had to add 4 cm in the waist area, adjust the volume of the chest, lower the shoulder seams, and along the line of sewing the yoke on the back, a dart was inserted for stooping and asymmetry.
It was decided to make the vest single-breasted, so on the mock-up front the width of the half-skirt was reduced from 6 cm to 3 cm (in the photo it is folded and pinned).

After trying on and clarifying the details of the pattern, it is necessary to place alignment marks and sign all the details, because Most paired parts in our case are asymmetrical.

And then cut the layout strictly along the seams.

Trim all allowances.

When all the pattern pieces are ready, you can start cutting.

DECATING
Before cutting, the fabric must be treated: wool and silk are ironed through a damp iron and allowed to cool and “rest”.

DAY 2. CUTTING AND DUPLICATION
To cut the pattern pieces from calico, fix the right side up on the right side of the main fabric (with the wrong side of the calico facing the right side of the wool). The main fabric is laid out in one layer. Using a ruler and chalk, outline allowances 1.5-2 cm wide.

Cut along the marked chalk lines.

Next, you need to transfer all the construction lines, as well as the marking of the entrance to the pocket and the line of the middle front. This can be done using a washable marker (pre-tested on an unnecessary piece of fabric) or basting stitches with a contrasting thread.

If you are sewing Burda patterns without changes, then the lining details can be transferred from the pattern sheet to polyethylene or tracing paper, and then to the lining fabric.
In this master class, changes were made to the pattern and a mock-up was made, and the lining details must match the parts from the main fabric.
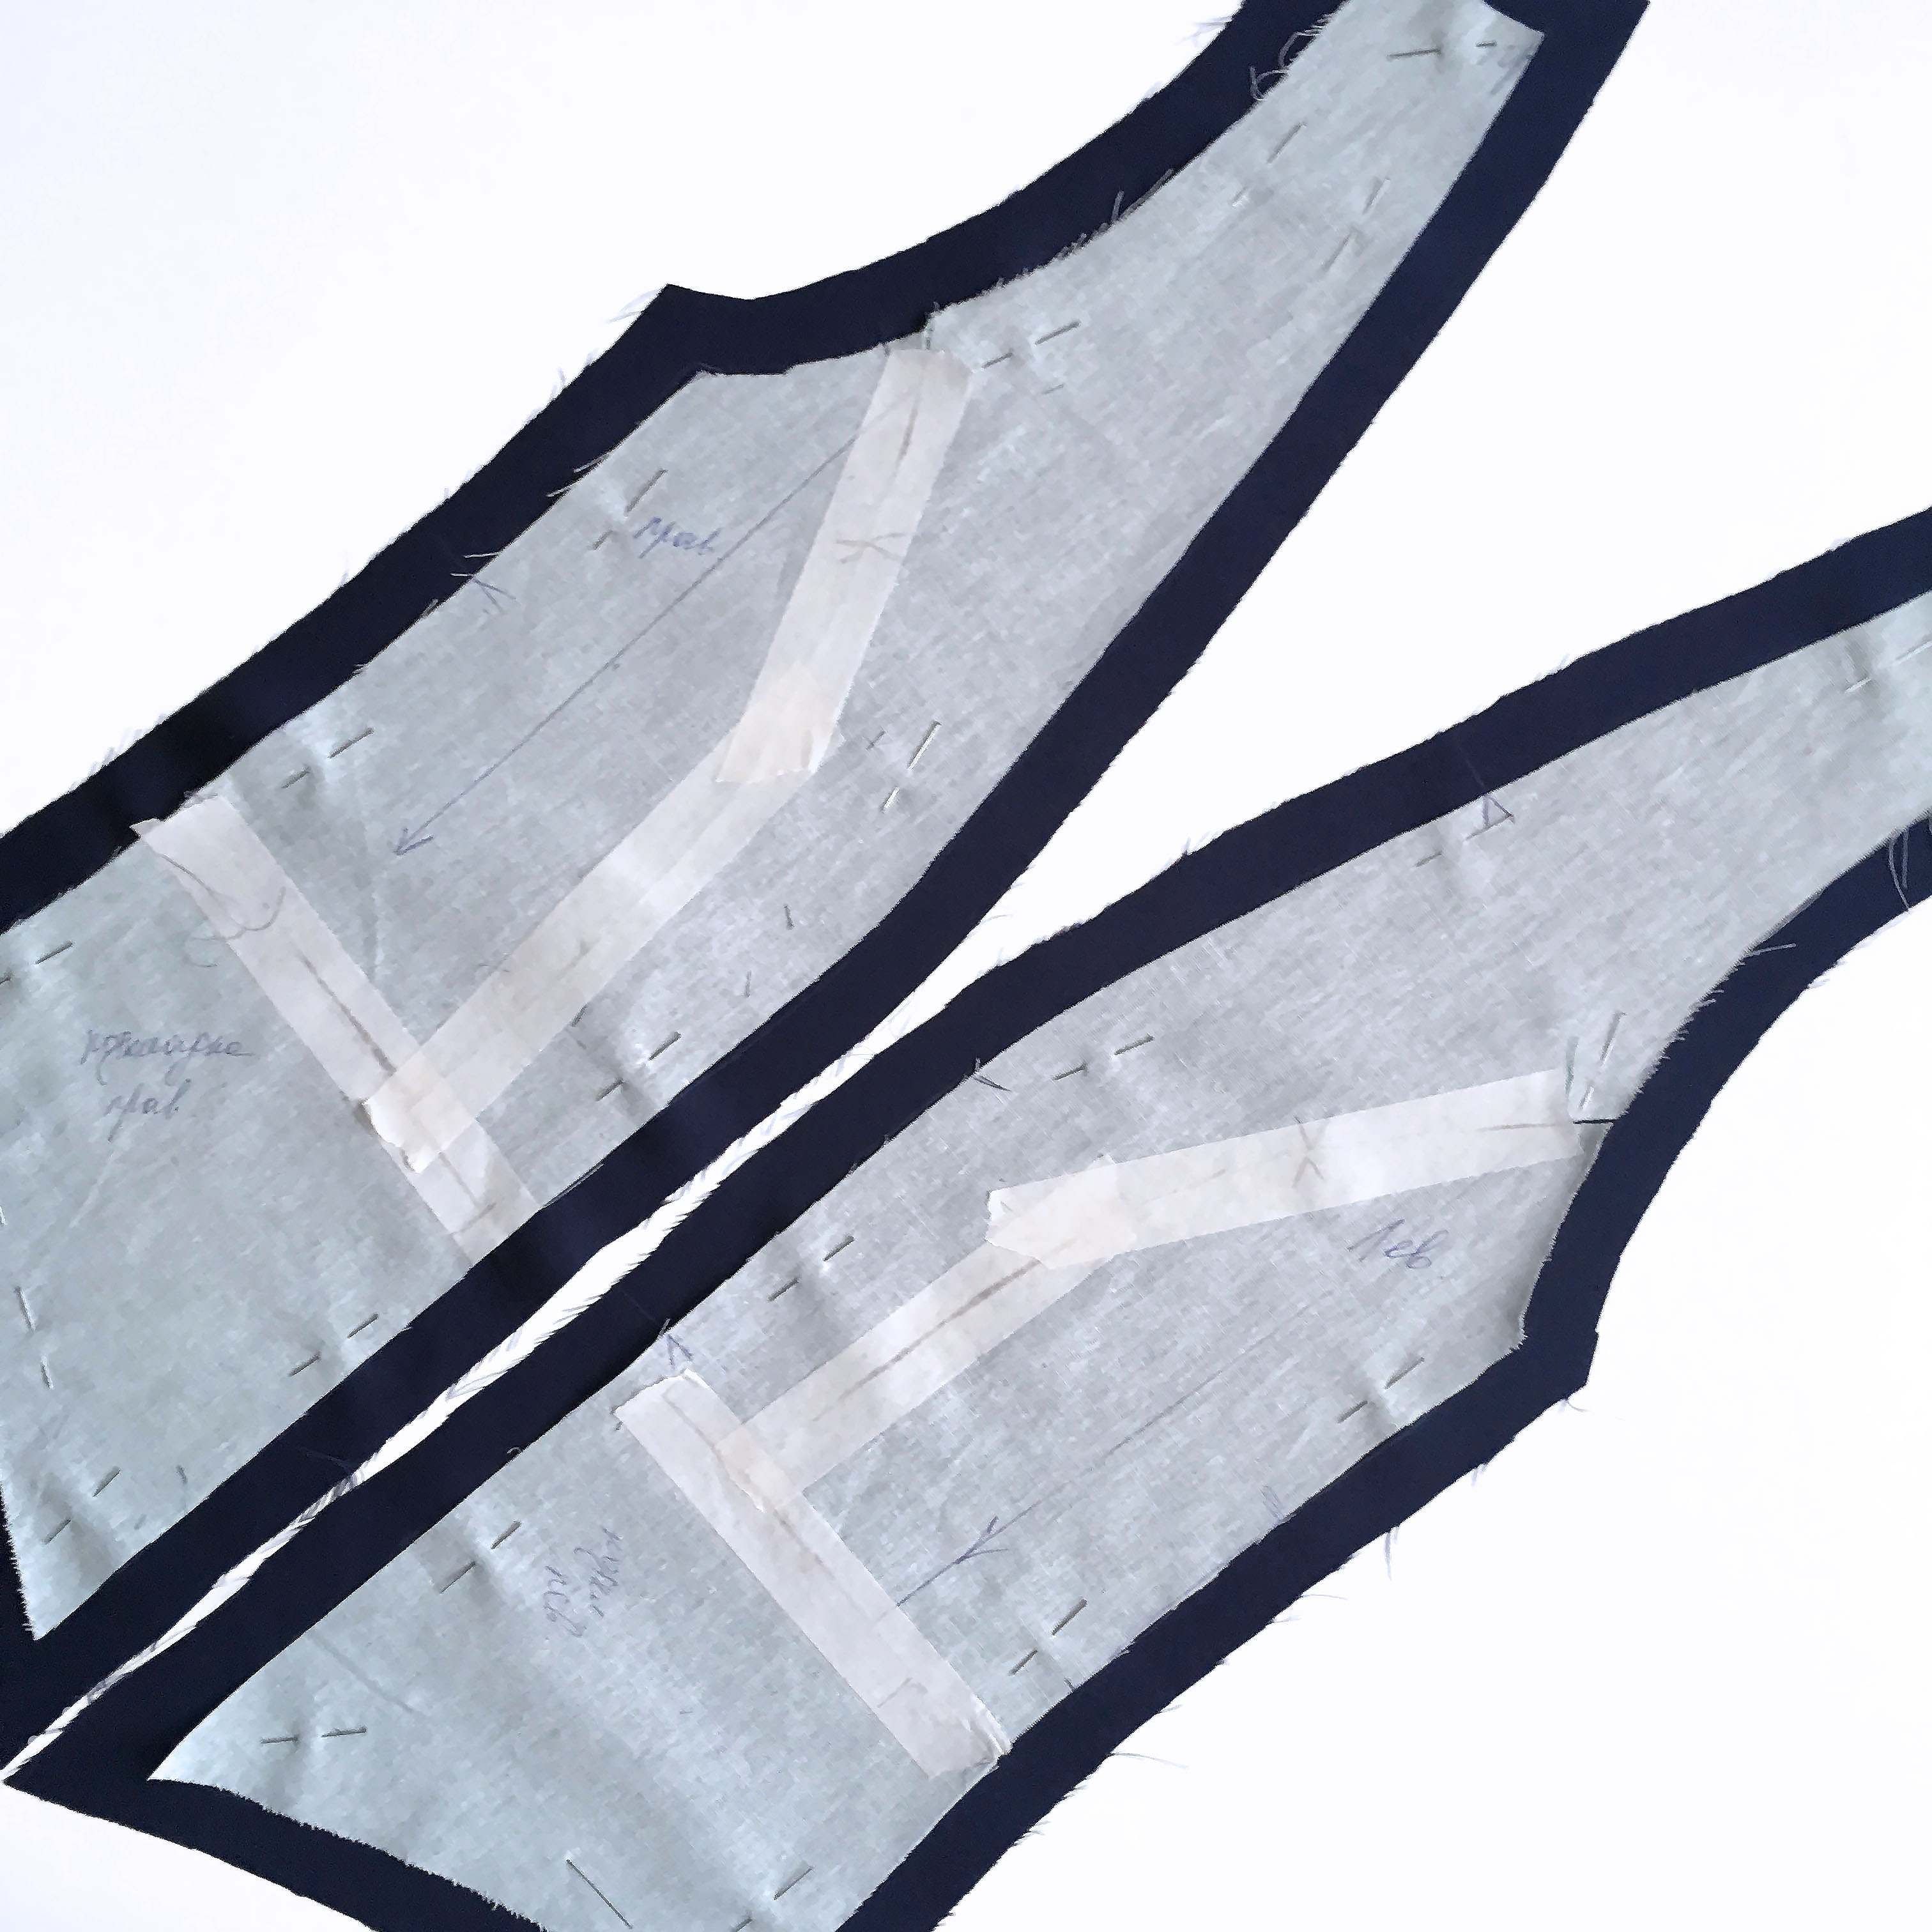
Therefore, to cut the lining, I had to make the following changes to the layout:
- connect the parts of the shelf and its side parts with masking tape;
- cut off the trim piece from the shelf;
- cut off the back yoke from the inside in the same way as from the front side (in the magazine the back of the lining is one-piece), since a dart was previously inserted into the stitching seam of the yoke.
Let's move on to cutting out the lining fabric.
We cut out the yoke and side parts of the back by placing ready-made parts from the main fabric on the lining fabric, back to back. 
The middle part of the back on the vest is made of lining fabric, so we cut two parts back to back, placing the corresponding part of the layout and marking allowances of 1.5-2 cm. 
We cut the side part of the back of the shelf by placing the corresponding part of the layout on the lining fabric, back to back.
In addition, we cut out the trim pieces from the main fabric, placing the corresponding layout details on the fabric, back to back.

Also from the main fabric you need to cut out:
4 pocket facings (cut on the bias) 17 cm long and 3 cm wide, including allowances.
From lining fabric:
2 burlap pockets 17 cm wide and 13 cm long, including allowances;
left back strap 18 cm long and 7 cm wide, including allowances;
the right back strap is 23 cm long and 7 cm wide, including allowances.

DUPLICATION
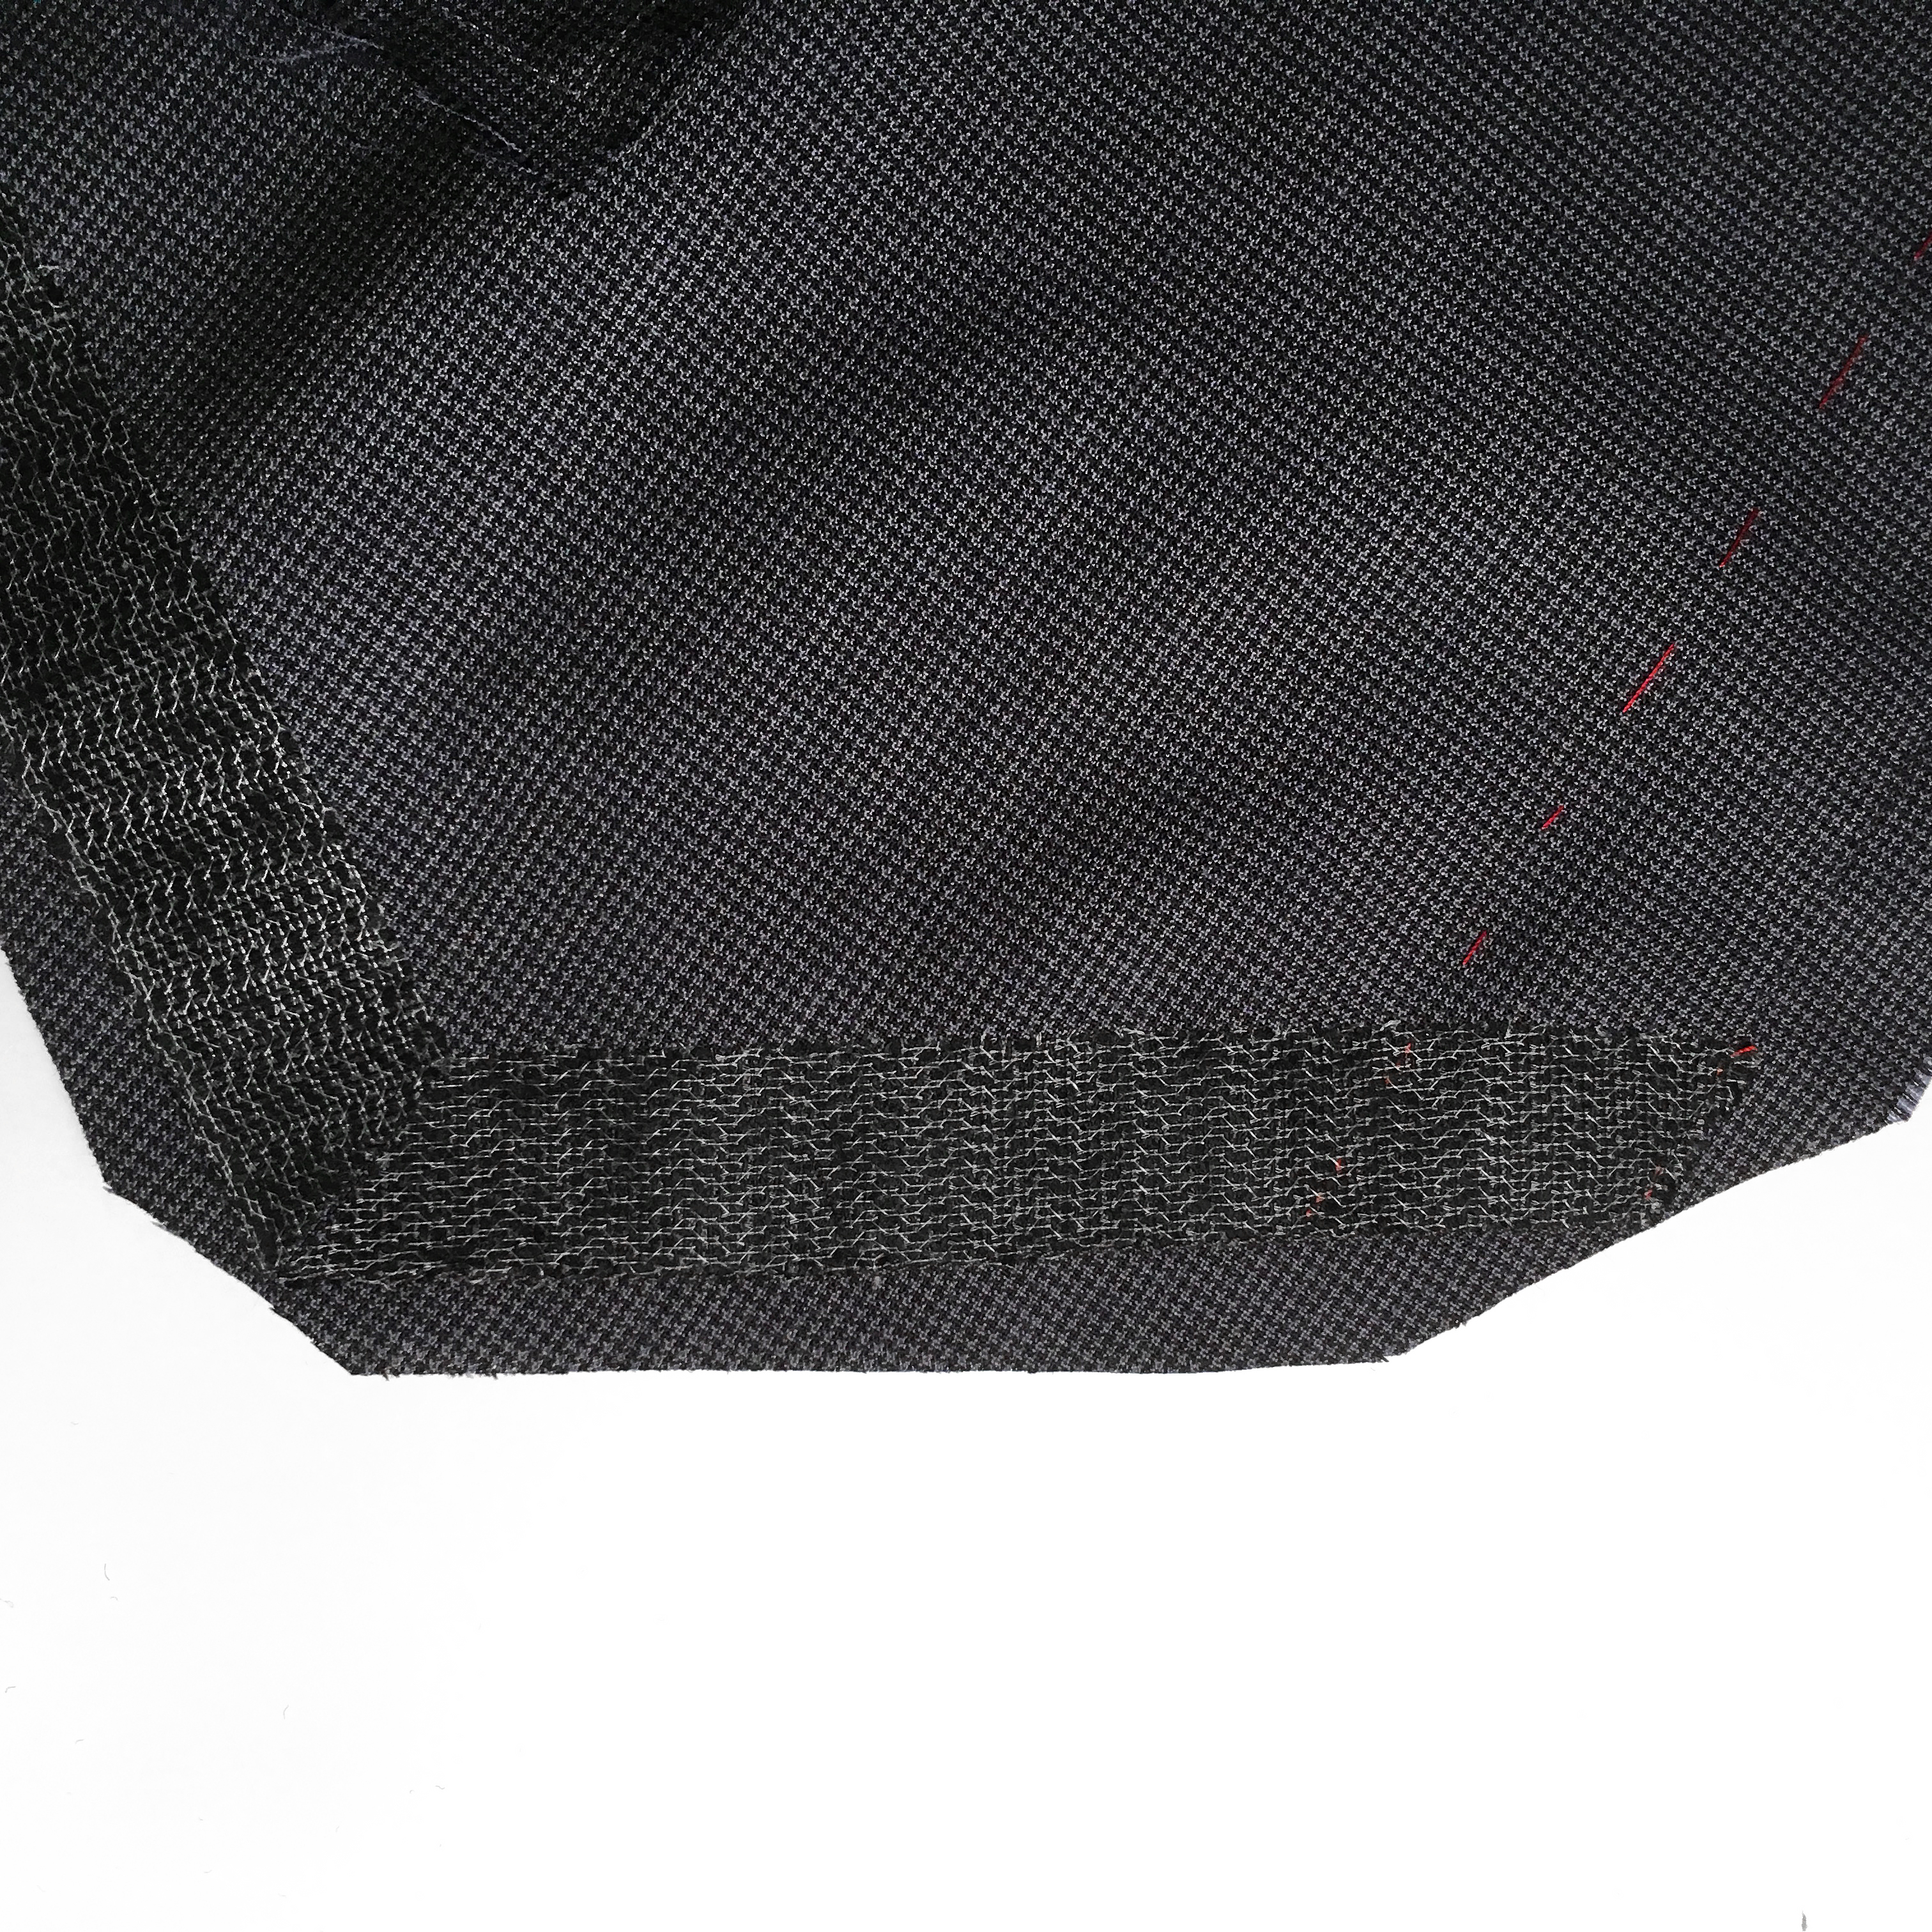
Using an adhesive pad we duplicate the details of the hemming and piping of the pockets.

Also, using an adhesive strip 2 cm wide, we duplicate the sections of the armholes and the lower sections of the parts made of the main fabric; we duplicate the back on the back part - the armholes and the bottom.


DAY 3. POCKETS AND ASSEMBLY OF VEST AND LINING PARTS
On three parts of the vest (the shelf, its side part and the side part of the back) we make welt pockets in the frame.
After the pockets are ready, you can assemble all the parts of the vest and its lining.
Sew the back yoke made of the main fabric to the middle part of the back (it is made of lining fabric). Iron seam allowances down. 

Prepare the straps: fold them lengthwise, right sides inward, and stitch, leaving one end open. On the right (long) strap, make one sharp. Turn the straps out and iron them.

Connect the back and its side by making a relief seam. Iron allowances.
Do not touch the shoulder seams yet.

Assemble the reverse side in the same way.
Sew the back yoke to its middle part. Iron seam allowances down.


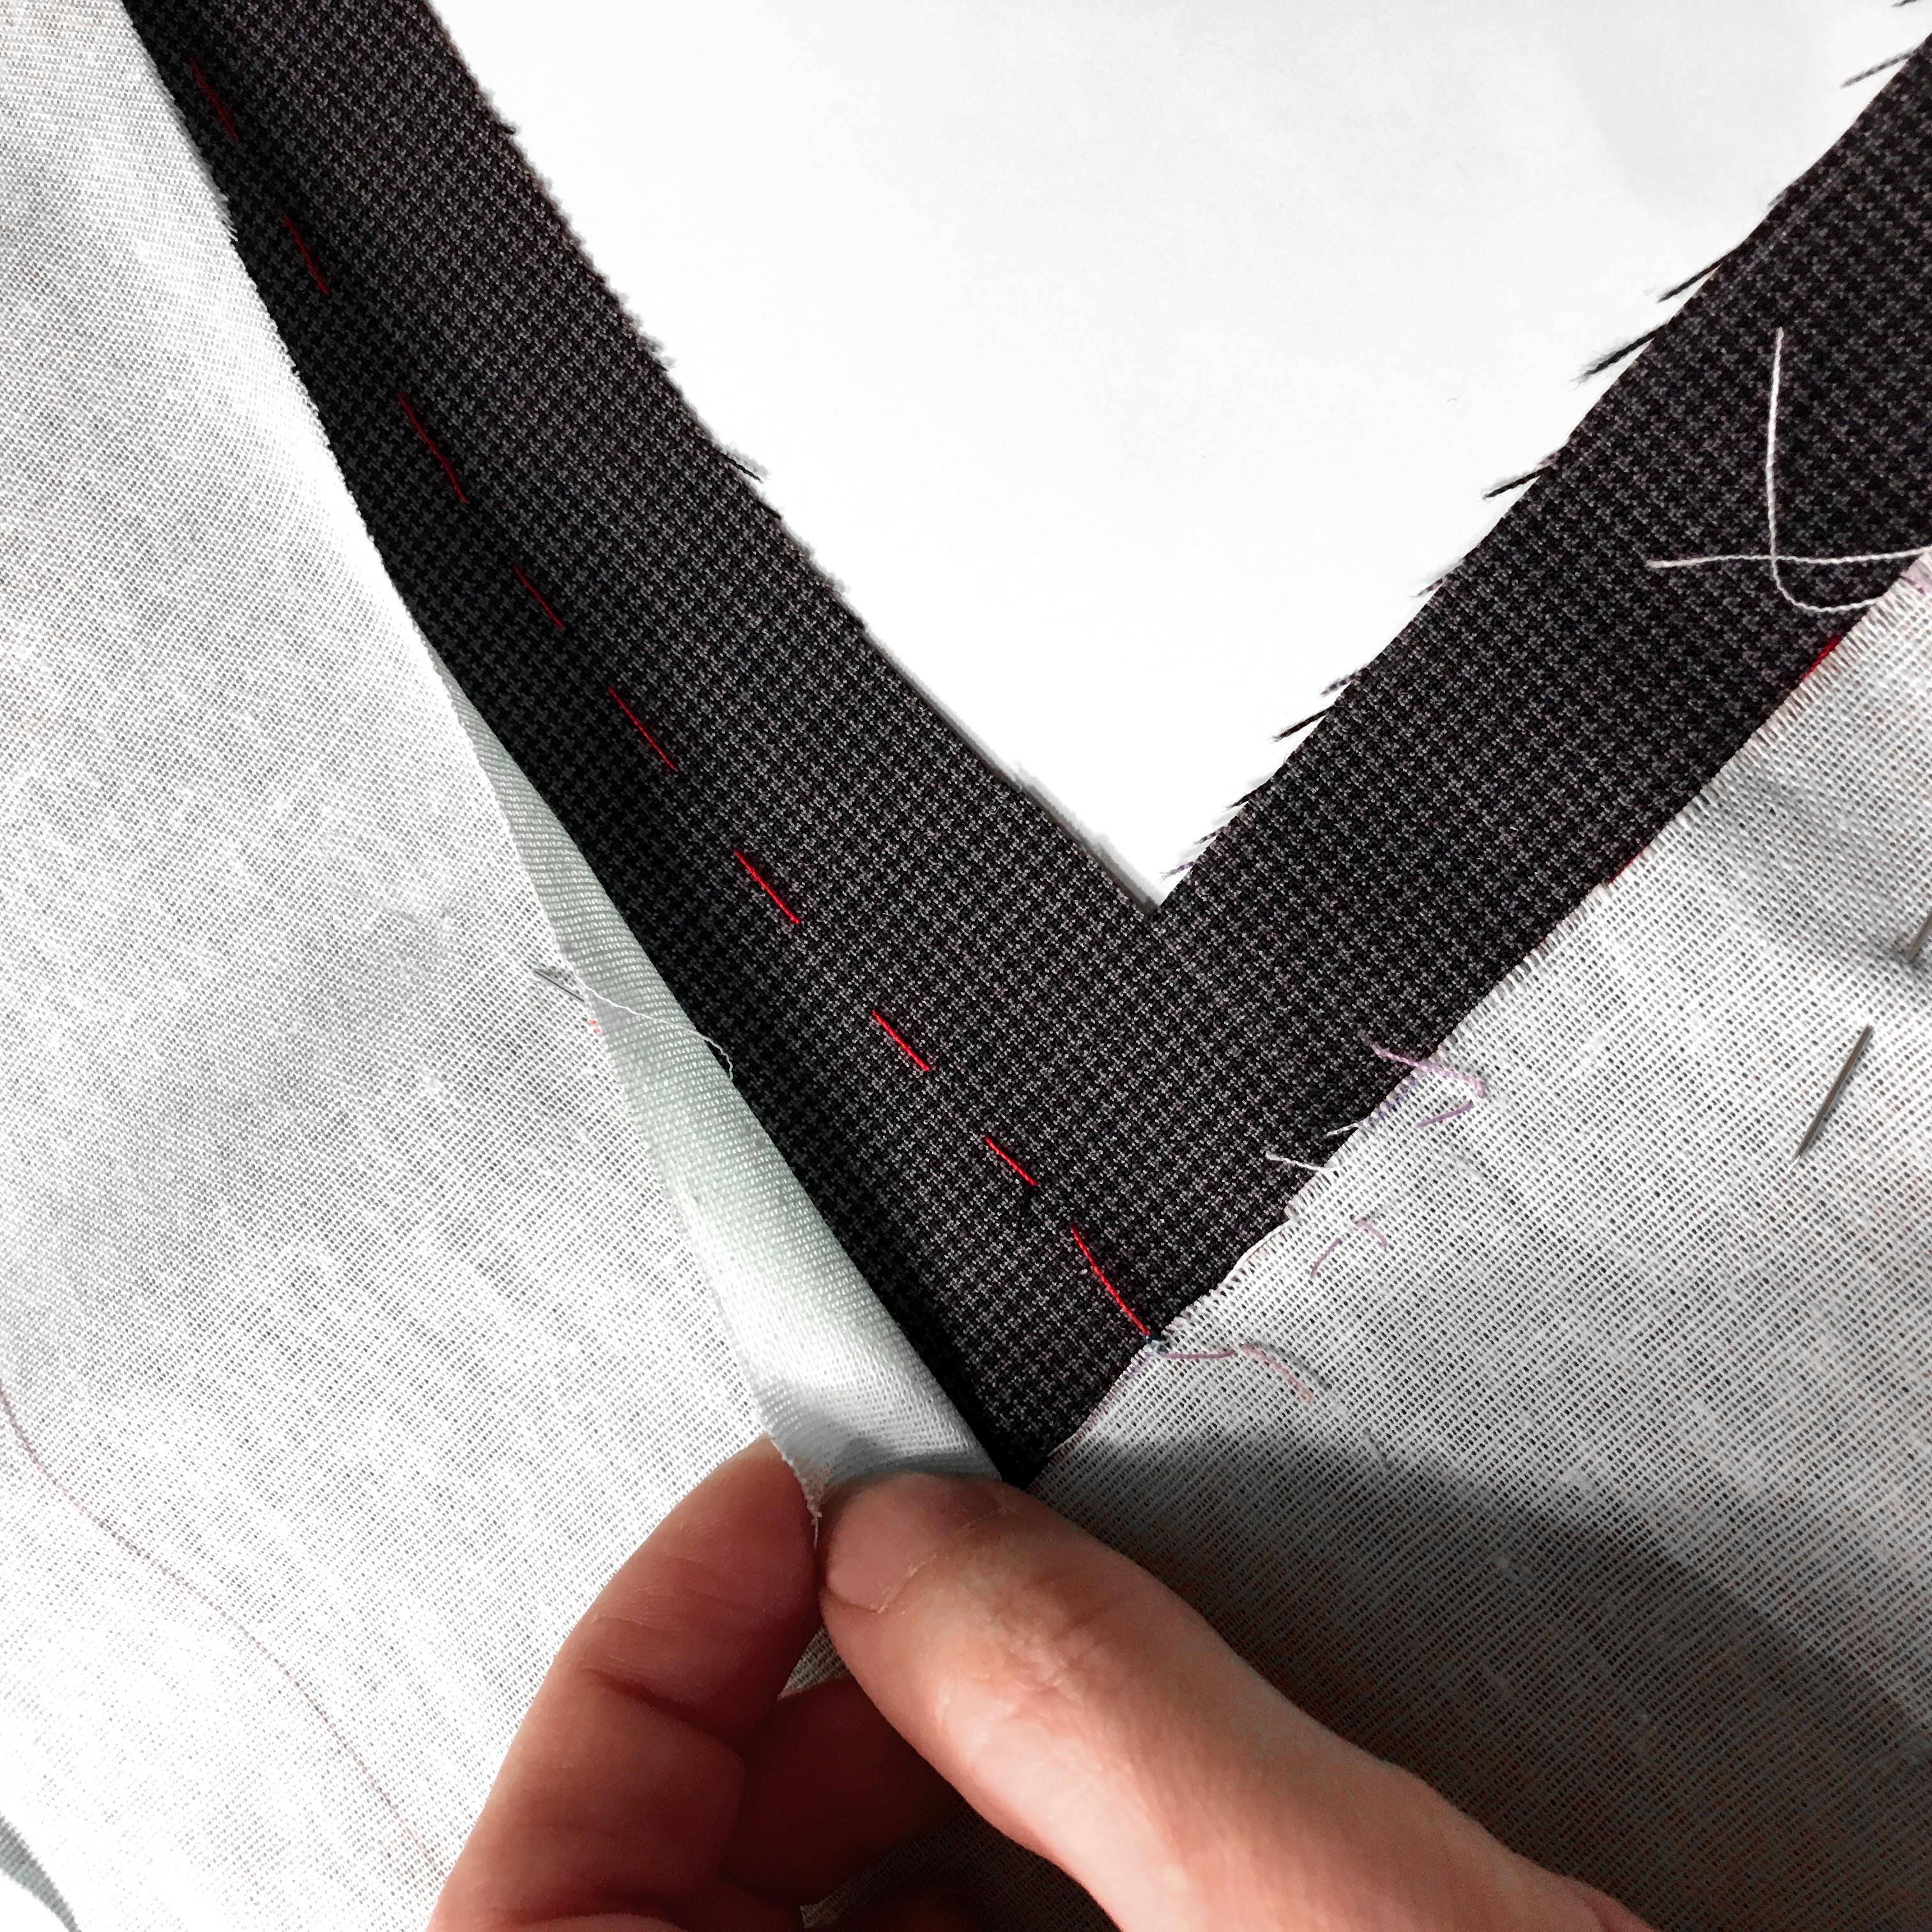
Sew the edges of the lining to the edges. Iron the allowances onto the shelf.


Along the edge of the hem from the side of the shelf, you can lay a manual finishing stitch, which will serve both a decorative role and a utilitarian one - to fix the allowance so that it does not bend or sag during the use of the vest.
To stitch evenly, use a ruler to mark the stitch locations with a disappearing marker.


We make small stitches 2-3 mm wide at a distance of about 1 cm from each other using a “back and forth needle” stitch.


Face and back of the seam “forward back needle”.


Sew a side seam, connecting the front and the side of the back. Press the seams.


Connect the back and its side by making a relief seam. At a distance of approximately 11 cm (at the waist), insert the straps into the reliefs with open cuts inward. Iron allowances. Do not touch the shoulder seams yet.

The order of connecting the parts may vary depending on your desire.
Thus, we got two “carcasses”: the main one and the lining one.
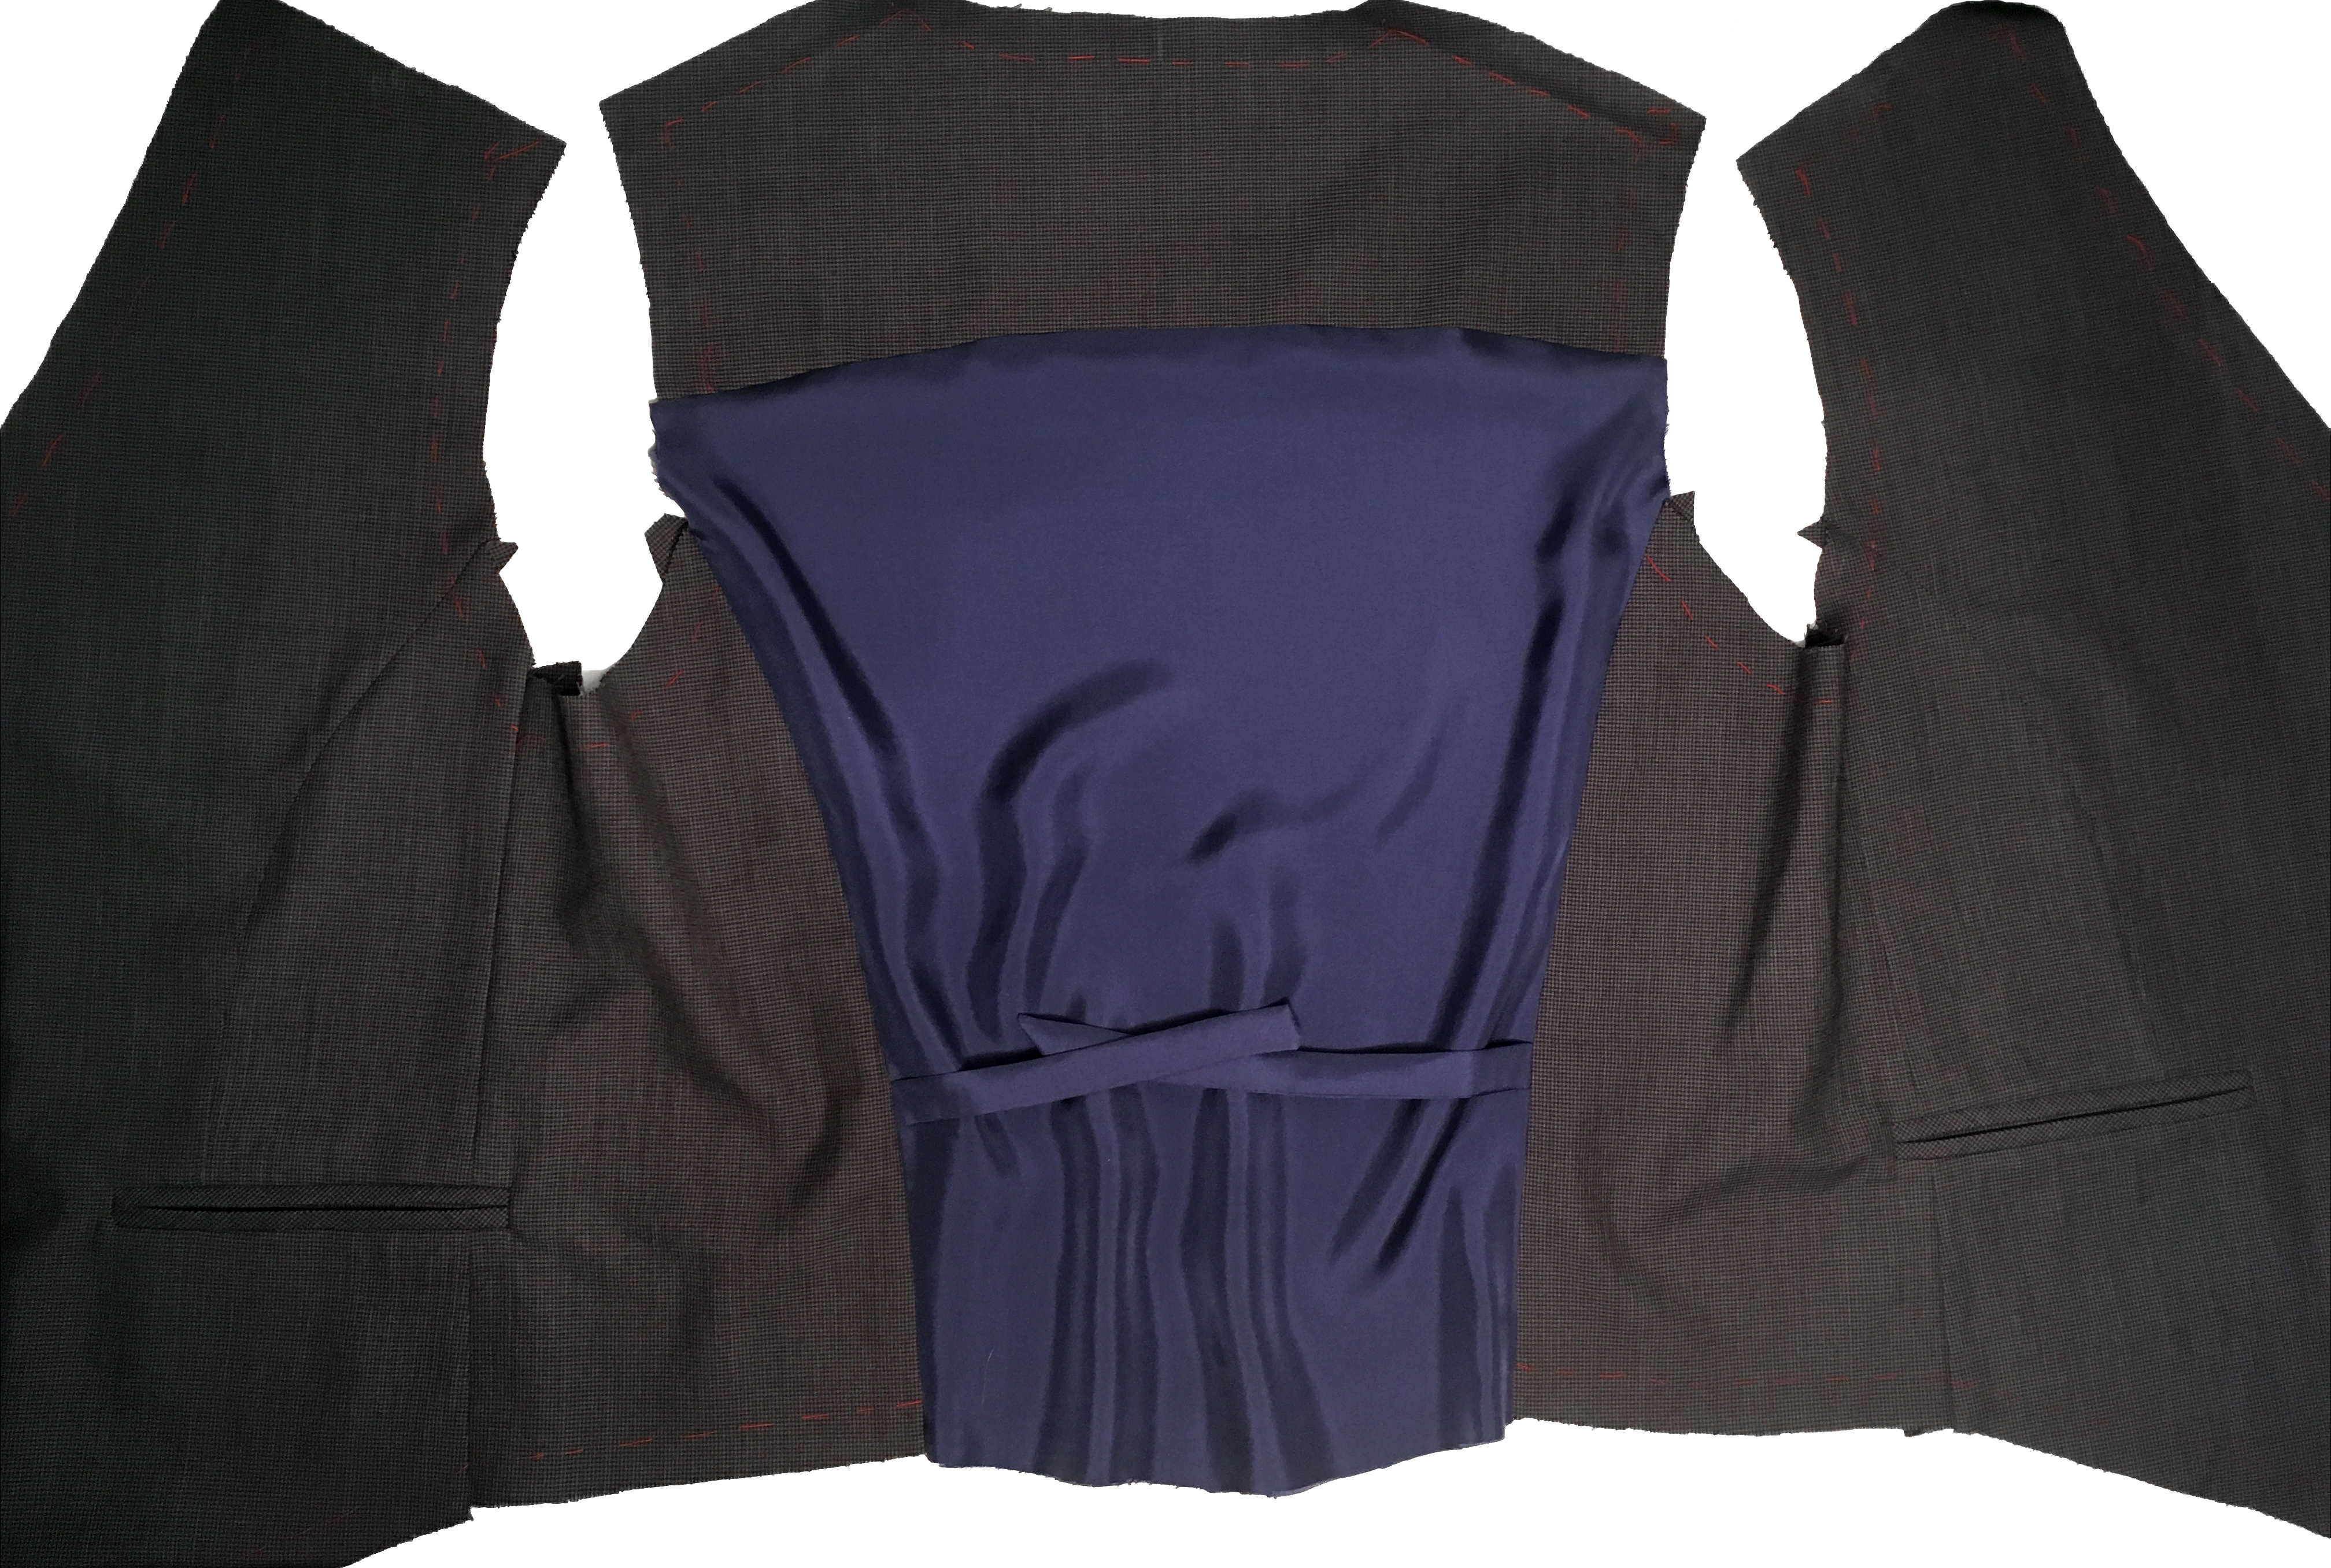

DAY 4. ATTACHING THE LINING
Place the lining on the vest, right side to right side. Pin together the neckline, armholes, sides and bottom of the vest, paying attention to the alignment of key areas (side and relief seams, bottom corners). Machine stitch along the pinched areas along the marked lines (basting).
Important: on armholes, the stitching begins and ends strictly at the marked line of the shoulder seam, i.e., it does not extend into the allowances.


Remove basting. Cut off the seam allowances at the neckline and armhole to 1 cm and make notches on the fillets. Cut out the corners of the side and relief seam allowances. Cut out the corner allowances for the bottom of the vest.


Iron the shoulder seam allowances on the lining inside out and you can baste.

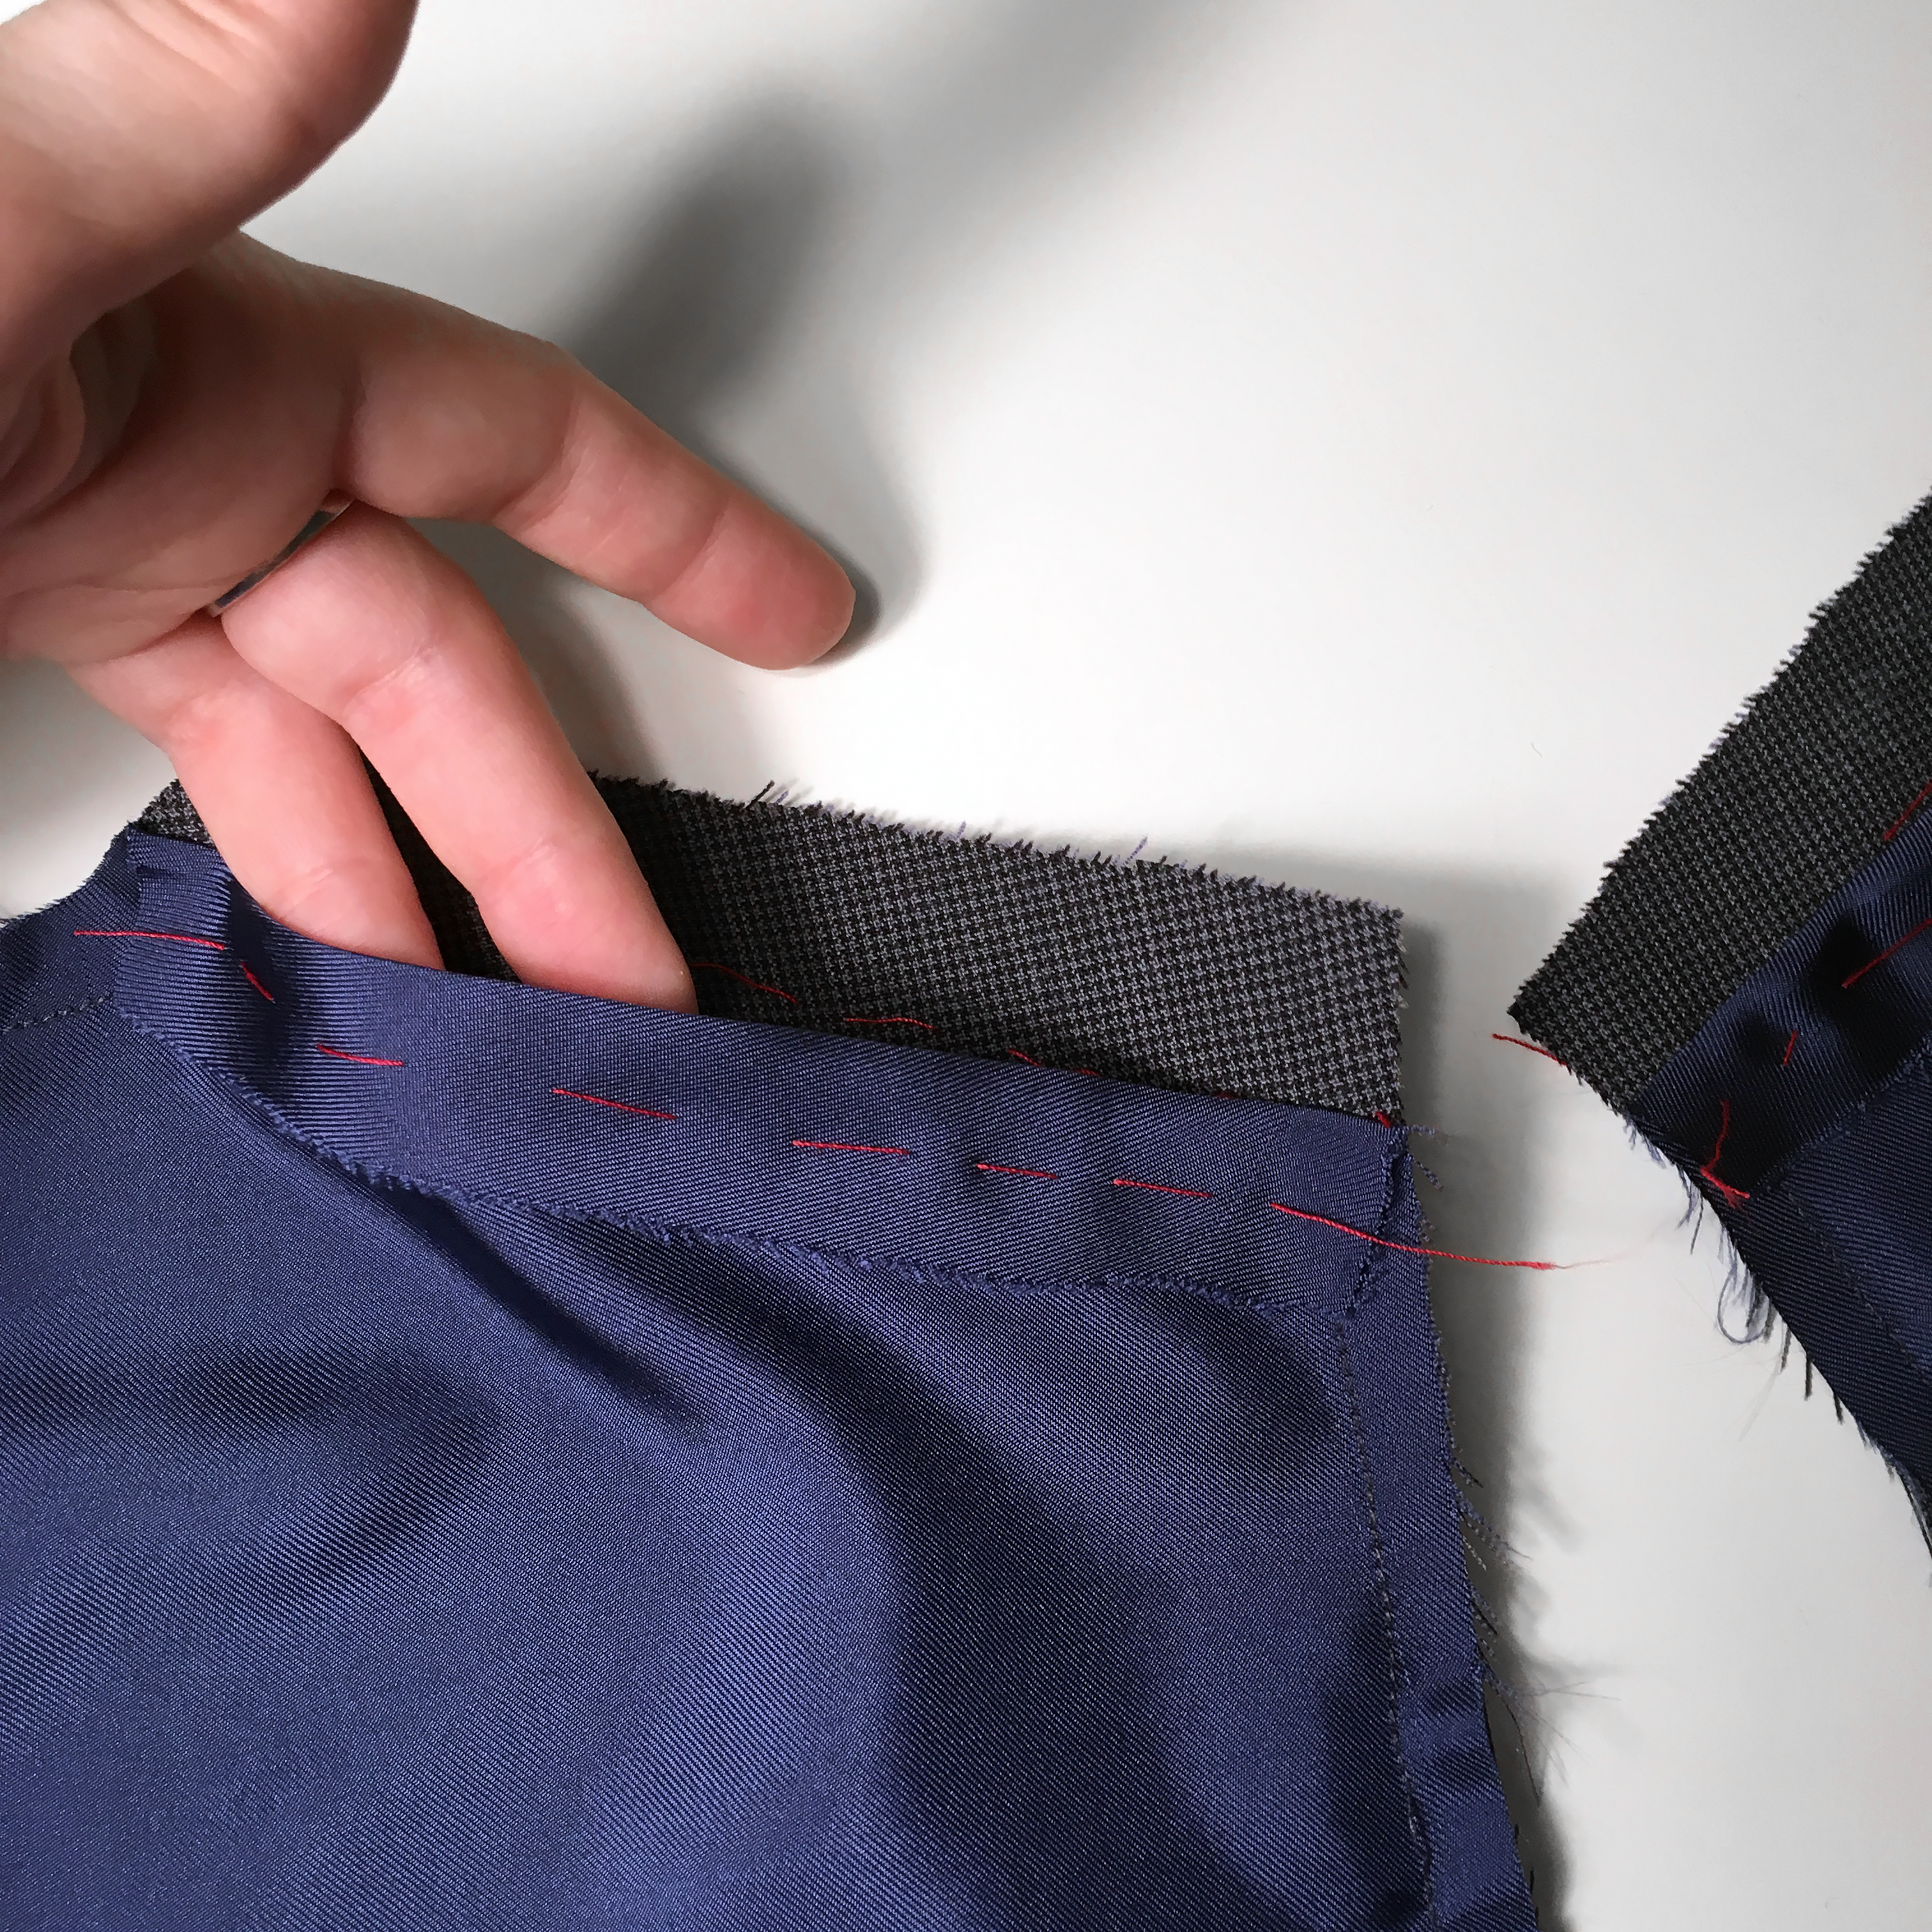
Turn the vest inside out through one of the open shoulder seams.


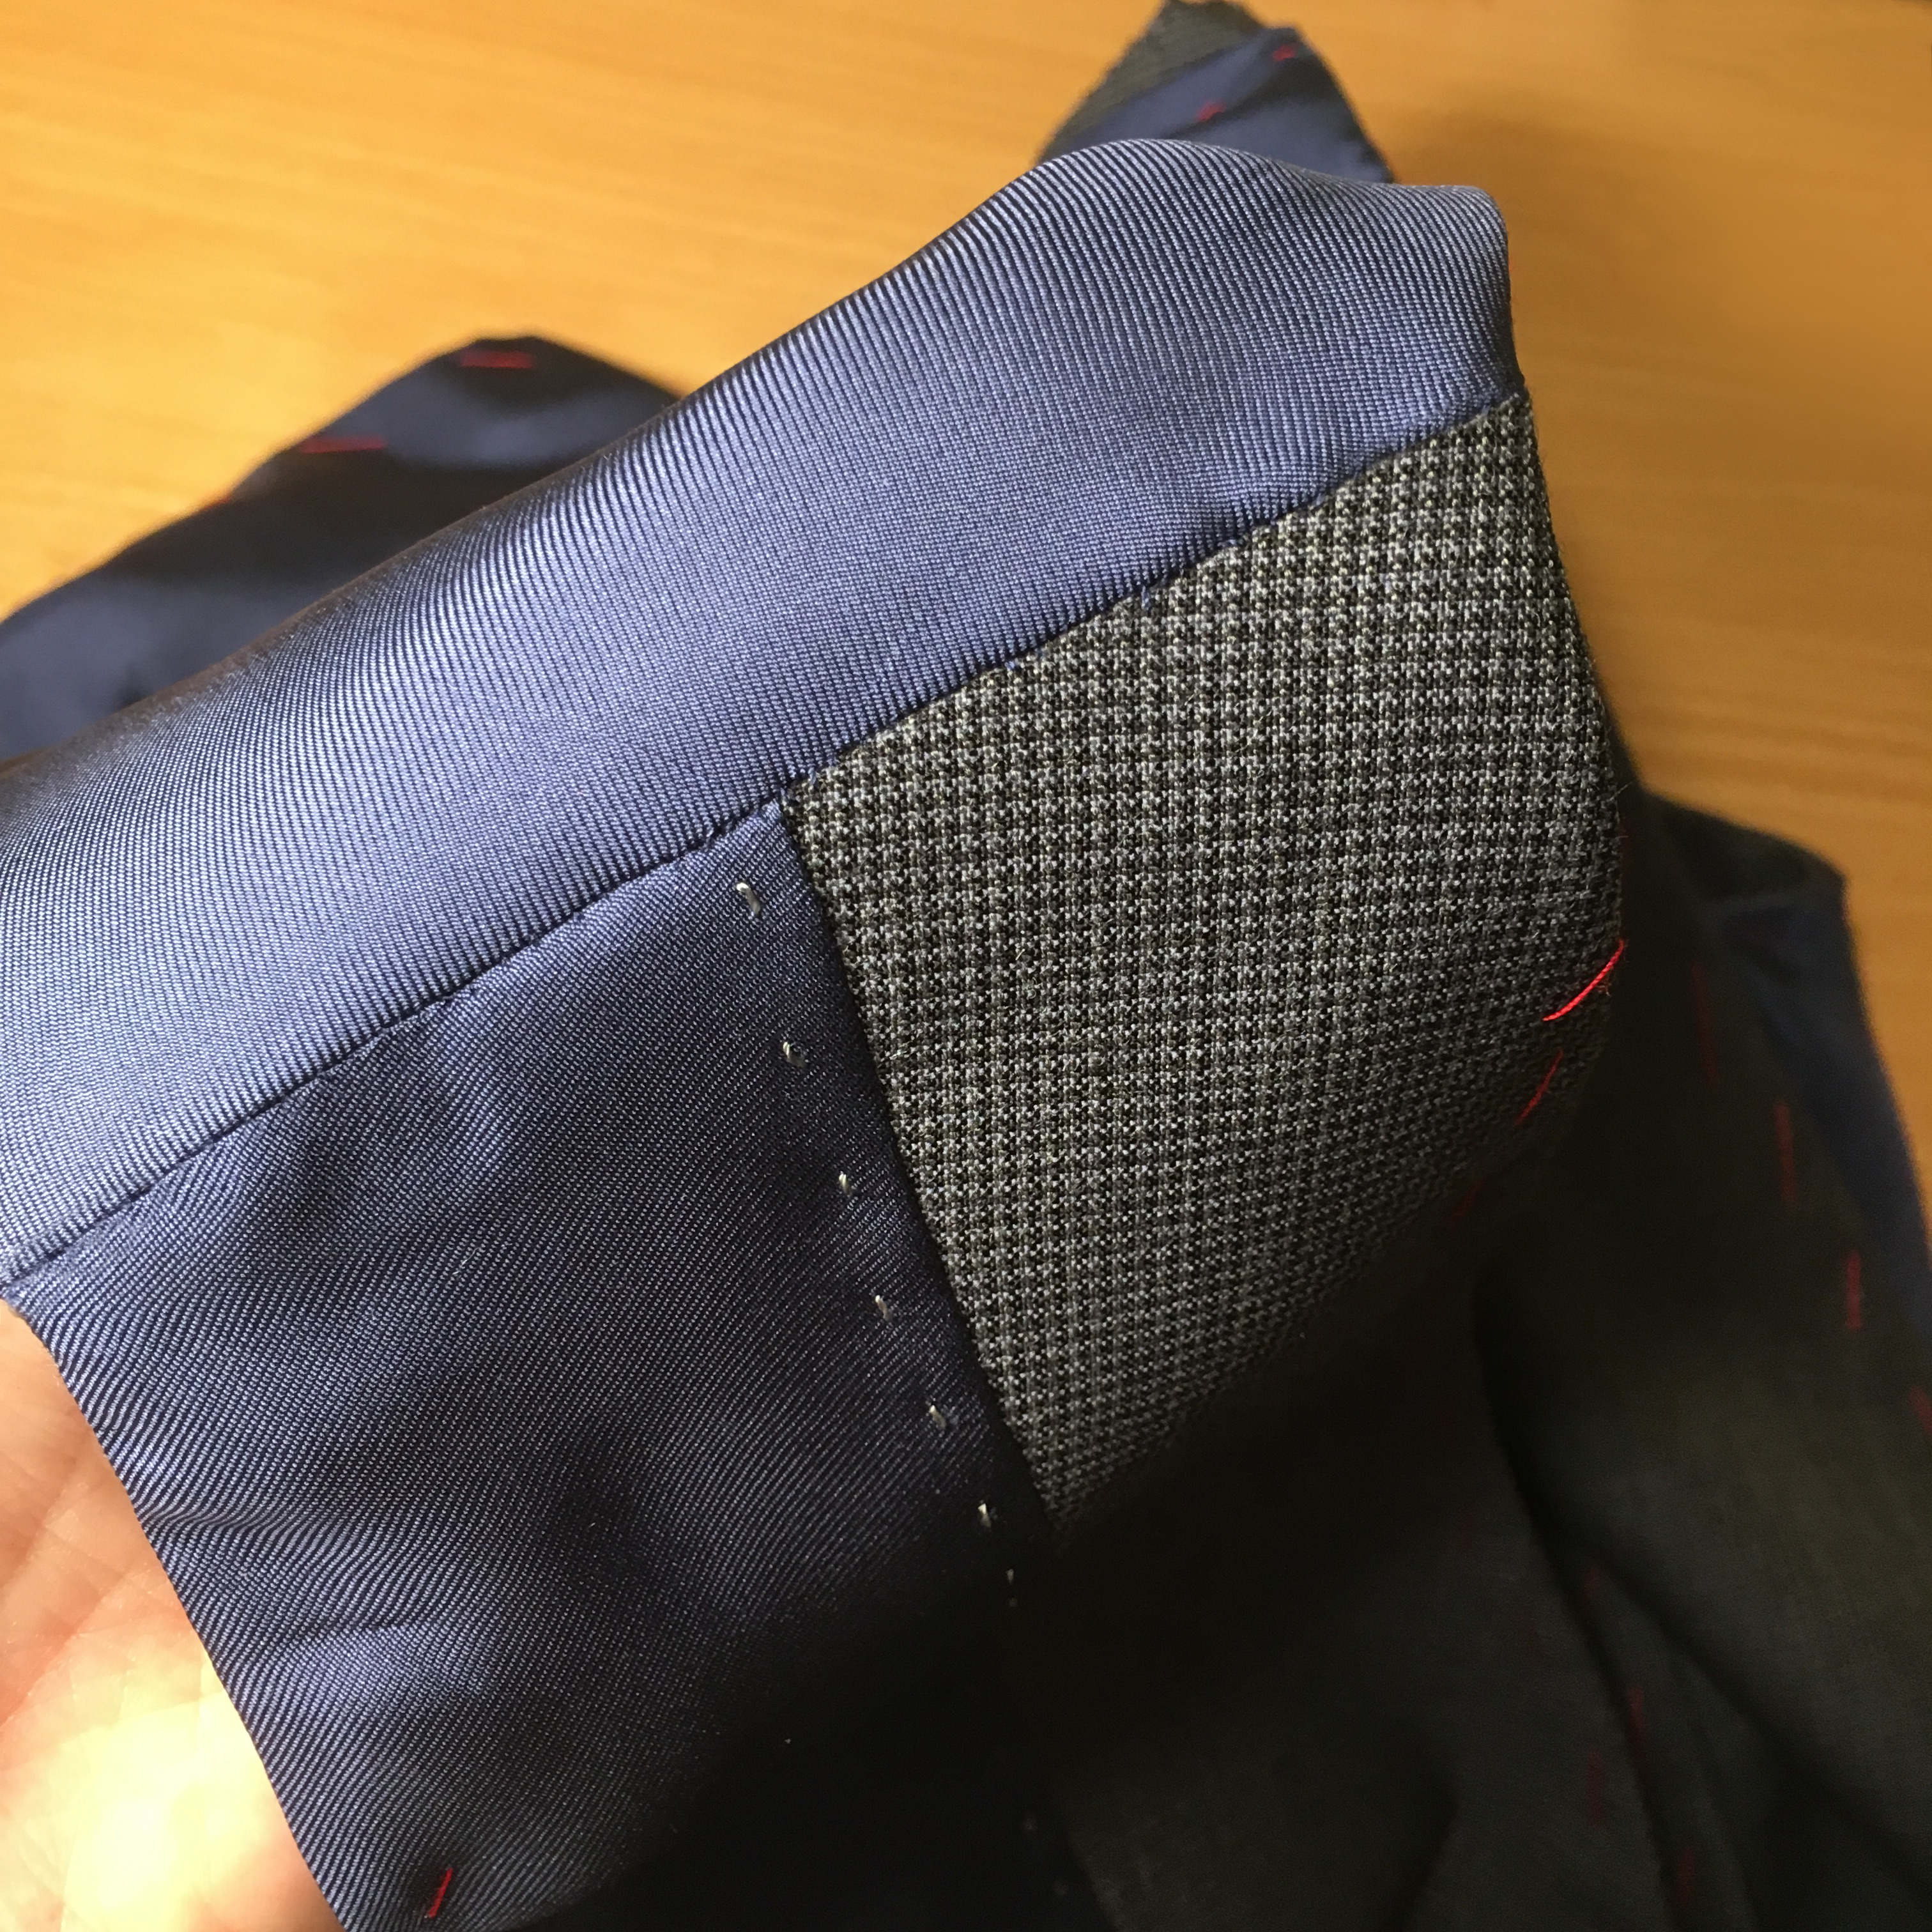
Spread it out with your fingers and sweep all sides of the vest. Iron.


Sew shoulder seams on main fabric. Iron the allowances and hide them under the lining.


Hand sew the shoulder seams of the lining using blind stitches.

DAY 5. HINGES AND ACCESSORIES
On the left shelf mark places for 4 loops. The loop should start 3-5 mm to the right of the mid-front line. My loop width is 2 cm, protrudes beyond the mid-front line by 0.5 cm, the distance between loops is 7.5 cm.

Using a special foot, sew the loops on sewing machine. I chose the type of loop with an eye. You can also sew the buttonholes by hand.


If the loop has a peephole, punch the peephole. I did this using a special hand punch and a hammer (nozzle diameter 2 mm), but you can pierce with an awl or carefully cut with small scissors.
After this, cut through the loop, being careful not to touch the threads.


Aligning the lines of the middle front on the right and left shelves, mark the places where the buttons will be sewn.

Sew buttons.

Sew a buckle to the left strap, wrapping it around the left edge. I managed to buy a special buckle for vests 2 cm high with a fixing bridge. But you can use a buckle with a regular bridge without a pin, or two frames or rings. An option with an overcast loop and buttons is also possible.


Carefully iron and steam the vest, and it is ready. 

And finally, what would I fix in my work:
1. I came across thin wool, so now I would glue the shelf and its side completely.
2. It was necessary to duplicate the neck of the back, but I didn’t do it.
3. In my case, it was not necessary to duplicate part of the shelf for the loops, but if the fabric is looser, then it’s worth doing it.
4.Personally, I don’t really like the lining fabric back option. However, if the future owner is going to wear a vest under a jacket, then this option is preferable. I would make the back out of wool. But this is a matter of taste and purpose of the vest.


A vest is a comfortable type of clothing that is present in men's, women's and children's wardrobes, and is worn as part of a suit or as an independent item. . In addition, it is often worn not only to make it warm and cozy, but also to add zest to your image, making it stylish and fashionable. The vest goes well with any outfit, and, most importantly, it is easy to sew it yourself, even with minimal sewing skills.


The fashion for vests has filled the catwalks and has not gone away for several years. Depending on the style and material, they are worn, combined with any style of clothing in the spring-summer and autumn-winter seasons, worn on their own or over T-shirts, T-shirts, dresses, pullovers, sweaters, jackets, or even replacing jackets and coats with them. Women's vests are made from various materials and decorated with embroidery, fur, fringe, rhinestones, sequins, appliqué, quilting, and decorative stitching. Often, vest models are complemented with pockets, hoods, lapels, small sleeves, a detachable lining, a belt and other functional elements.
DIY men's vests, photo


A vest, depending on the style and material, can add elegance, brutality or style to a man’s look.
There are several types of this type of clothing:
- a classic vest worn with a suit for formal events and to the office. Often the back part of such a vest is made of lining fabric, which provides convenience when combined with a jacket;
- a sports vest is a model insulated with padding polyester or holofiber that can replace a sports jacket or sweatshirt. Often complemented by a hood; an insulated vest is a practical type of clothing that replaces or complements autumn jacket. Recently, models made from natural fur have gained particular popularity among men. They provide comfort and emphasize the status of the owner;
- A biker vest is an element of image. It is sewn from denim or leather and decorated with metal rivets and stripes.
The choice of one model or another depends on the taste and lifestyle of a man. Elegant classic models, as a rule, are preferred by office employees and representatives of the service sector, sports ones by those who lead an active lifestyle, go in for sports or tourism, men leading a bohemian lifestyle choose original and exclusive models.
DIY vest patterns, details with photos
Like sewing any other type of clothing, the process of sewing a vest begins with creating a pattern. To create it, use a pattern for the base of a dress or jacket or coat. Unlike contours basic pattern, when modeling a vest, the back neck deepens by 2 cm, the armholes of the front and back by 1.5 cm. Darts or reliefs, pocket locations, product length, neck shape and hem lines are modeled depending on the chosen style of the future product. Below are options for vest patterns of varying complexity for men and women.


Basic measurements that will be needed when constructing the parts of the vest:
- chest, waist and hip circumference;
- product length, shoulder.

- Long jacket style vest


Women's lapel cropped vest


An example of constructing a simple pattern for a women's fur vest based on just one measurement is demonstrated in this video.
How to quickly sew a vest with your own hands without a pattern
A vest is a type of clothing that anyone can make with their own hands, even if they have never tried to sew before. In this case, it is recommended to choose models, the implementation of which does not require the creation of complex patterns and careful processing of individual components - sewing in a collar or hood, sewing in the lining, hems, fasteners. This allows you to sew a vest, even without using a sewing machine.
The simplest but most effective vest is made from a rectangular piece of fabric with non-fraying edges:
- fleece;
- polar fleece;
- neoprene;
- loden;
- knitwear;
- cloth;
- leather or leatherette;
- natural or artificial sheepskin coat.
In addition to fabric, to sew a vest you will need scissors, a ruler and chalk.


- Draw a rectangle 75×115-140 cm on the fabric.
- Fold it in half.
- Along the upper edge, at a distance of 21 cm from the fold of the fabric, mark a point from which to set 15 cm down.
- Mark armholes 20-25 cm deep.
- Make cuts for the armholes.
The vest is ready! This model can be worn unbuttoned. In addition, it looks good when wrapped and tied with a belt or fastened with buttons, hooks, snaps, or a zipper. To do this, you will need to place a fastener on the vest's shelves.
A beautiful vest with softly draping round tails is made from a circle with a diameter of 110 cm.
- Draw a circle and mark its center.
- Stepping 25 cm apart from the center of the circle, mark the lower points of the future armholes.
- From these points, draw perpendicular segments 25 cm long and make cuts along them.


Like the previous model, a wrap-around vest with round tails can be worn unbuttoned or tied with a belt. If you have a machine, all sections can be treated with decorative trim, narrow strips of leather or fur.
The original vest is made from a large Pavloposad scarf or lace scarf. Using the diagram below, sewing it will be easy.

Using scarves with bright prints, you can sew a beautiful vest, as in the photo.


You can make a cute vest with your own hands, even without a pattern, if you use a ready-made jacket as a basis. This video demonstrates how to make a fashionable vest out of an old jacket.
How to sew a vest from an old fur coat with your own hands, master class
Fur vest - fashion trend recently, which men, women and children wear with pleasure. Not a single autumn-winter collection is complete without such models. They are worn in combination with clothing in sports, folk, business and casual styles.


The style of the vest can be any - short or long, straight, trapezoidal or fitted. Particularly popular, due to their practicality, are elongated vests made from natural and faux fur, sheepskin, as well as combinations of leather, suede, cashmere, wool, jacquard, knitwear with fur.
 You can sew a fur vest yourself using:
- artificial fur;
- natural skins;
- old fur, for example, a fur coat;
- scraps of fur.
The length of the pile also does not matter - the vest will turn out beautiful from astrakhan or mink, as well as from silver fox or scribe. To avoid damaging the pile when cutting the vest, the vest should be cut with a sharp stationery knife, after first transferring the contours of the parts to the wrong side of the fur. If the parts are assembled in separate pieces, be sure to take into account the direction of the pile when cutting.

You can sew the cut parts by hand or on a furrier's machine. Separately, using the same patterns, you should assemble the lining and sew it to the already assembled vest. Make a fastener by sewing hooks, ties or making loops and sewing on buttons.

You can see in detail how to sew a new fashionable vest from an old fur coat in the video below.
You can sew a fashionable vest from natural fur even without a machine, using only a crochet hook, thread, a gypsy needle and a punch. How to do this is shown step by step in the photo.


Original do-it-yourself women's vest


You can sew an original women's vest from almost any artificial or natural material:
- fur;
- velvet;
- leather or suede;
- jeans or corduroy;
- linen, cotton or silk, knitwear, mixed fabrics;
- guipure, tapestry, jacquard, wool and other materials.
In addition to fabrics for sewing a vest, you can use your favorite things that are no longer worn, as well as scarves, stoles and even just beautiful rags. Thanks to the use of patchwork and quilting techniques, they produce exclusive models. Examples of sewing vests from various materials can be seen in the video below.
How to sew a men's vest with your own hands, master class
Every woman who knows how to sew a little and has chosen a suitable pattern can independently make a vest for her beloved man. Sewing a vest begins with cutting. To do this, you need to re-shoot or print the details of the vest. Lay them out on the fabric lengthwise, outline them with chalk, mark the seam allowances - 1.5 cm each. Cut out the parts, baste them and try them on, make adjustments. Then assemble the vest - first stitching the darts, then the shoulder and side seams, ironing them. After this, it is necessary to process the sections of the armhole, neck, sides and bottom with tape, knitted elastic or facing. The assembly is completed by the design of the fastener - it can be with buttons, buttons, hooks or a zipper. When using fabrics with non-fraying edges, the section processing step can be skipped, leaving them open. This casual design looks great on casual jeans and linen. If thin and soft fabrics are used to sew a vest, in order for them to keep their shape, the parts of the shelves can be glued with non-woven fabric. In this case, it is recommended to place the vest on a lining. It is cut out of lightweight fabric in bright colors, using the same pattern as for the top details. The lining is assembled in the same way as the top parts, sewing down the shoulder and side seams and ironing them. Then, fold the lining and top face to face, join them with one stitch, leaving a small gap to turn the vest facing. Carefully sew up the remaining open area and iron all seams. Use a single stitch to connect the lining to the top at the armholes, and iron the seams. Features of the stages of sewing a vest can be seen in the video below.
How to sew a vest from jeans with your own hands, step by step with photos

The return of 90s fashion to the catwalks has made denim vests popular again. This allowed needlewomen to take a closer look at the old denim items in their wardrobes and use them to create new ones. fashion element clothes.
 1. The easiest way to make a fashionable vest is from an old denim jacket or shirt, while its style and color do not really matter. Simply cut off the sleeves and the vest is ready.

 2.
2.
An original vest model can be sewn by purchasing a piece of denim specifically for this purpose. For sewing you will need up to 1 m of fabric.

Denim vest pattern
 Assembling parts cut from fabric is not difficult. To do this, you need to machine sew the shoulder and side seams. The processing features of the neckline, armhole, hem and fastener depend on the intended design. If desired, they can be deliberately left untreated, since the resulting fringe is back in fashion.
A denim vest can be decorated with lace, ribbons, fur, patterns applied with special acrylic paints, stripes, stones or metal rivets, spikes, eyelets, zippers, add abrasions and holes. Such decor will add uniqueness to a hand-sewn denim model.


The master class, presented in the video below, demonstrates in detail how to sew an original vest from old jeans.
An example of the decor of a DIY denim vest is shown in the video below.
DIY vest for a boy
 Since the vest is a universal type of clothing, it can be seen not only in an adult’s wardrobe, but also in a children’s wardrobe. First of all, a vest is necessary for schoolchildren, since it is part of the school costume, but in ordinary life it will become indispensable, allowing the child to feel warmer and more freely than when wearing a jacket. The video below shows how to sew a classic vest for a boy. The first video discusses the features of pattern construction, the second - sewing technology. By following the recommendations and observing the work of the craftsmen, even a novice seamstress can sew a vest for a child.
https://youtu.be/zgcu94eEA44
Vest for girls
Girls, like boys, enjoy wearing vests. A significant difference between girls' vests and boys' vests is the presence of decor in the form of decorative stitching, embroidery, appliqué, fur trim, etc.
 By copying adult styles and transferring them to children's sizes, you can sew beautiful vests in which the girl will look stylish and fashionable. To sew a vest for a girl, you can use the same pattern as for a boy’s vest, moving only the fastener to the other side. The video below demonstrates the features of sewing a girl's vest.


Any young fashionista will appreciate the comfort and functionality of a fur vest, which can be sewn according to the recommendations presented in this video.
Straight or fitted, short or long, vests remain a universal wardrobe element that will be appropriate to wear on weekdays and holidays. Sewn with your own hands and put on, it will add exclusivity and elegance to your outfit, and will make you feel cozy on a cool evening. Since the vest, in addition to its unitary function, is also decorative in nature, when sewing it, the use of unusual styles, combinations of materials and finishes is encouraged.

The image of an elegant man can captivate any representative of the opposite sex. A sophisticated classic suit, highly polished shoes, discreet accessories, and a fashionable haircut attract the eyes of many beauties. Great importance The style of a men's vest plays a role in creating a harmonious image of a successful and fashionable person.
Vest as an element men's wardrobe has a lot of different options. Depending on the preferred style of clothing, a man will be able to choose an individual vest for himself. But if you don’t find a unique item in the shopping aisles, don’t despair! You can sew the perfect vest yourself.
To do this you need:
- choose a style;
- decide on the fabric.
The counters of modern stores are ready to offer fabric that meets the requirements of the most fastidious fashionista.

Different colors, textures, and composition can complicate an already difficult choice.
 The fabric for the vest should be chosen based on the style.
Types of men's vests
Let's figure it out what types of men's vests exist:
- solo vest;
- vest - leather jacket;
- classic vest;
- vest-frock coat;
- knitted vest;
- insulated vest.
Solo vest draws all the attention to itself. This option should fit the figure, but be wide at the armholes so that the bottom layer of clothing looks neat. The model visually tightens and makes the figure slim. A standard pattern for such a vest will not work. Lapels, a stand-up collar, and a round neckline will make the item sophisticated.
Vest - leather jacket will complement a brutal biker style look. Ideal for any time of year. You can wear it with T-shirts and various jumpers.
 Classic vest
will be an integral part classic suit for business meetings, trips to theaters and official receptions. Such a thing made of thin material will be an excellent addition to any man’s wardrobe. It can be worn with or without a jacket, on a shirt, long sleeve, or jumper. Classic vests can be made from different fabrics: from knitted to cashmere.
Classic vest
will be an integral part classic suit for business meetings, trips to theaters and official receptions. Such a thing made of thin material will be an excellent addition to any man’s wardrobe. It can be worn with or without a jacket, on a shirt, long sleeve, or jumper. Classic vests can be made from different fabrics: from knitted to cashmere.
A stylized design will help emphasize belonging to a bygone era of luxury. vest-frock coat. You will have the opportunity to show off in such a unique thing at the New Year's carnival.
Knitted vest can not only complement the image modern man, but also to keep you warm in cool weather. You can wear it with long sleeves or long sleeve shirts.

Insulated vest will be a complete replacement for a jacket in the cold season. As a rule, it is sewn with a synthetic padding lining and a hood. You can wear the vest over a warm jumper, long sleeve, or shirt. It all depends on the air temperature. In the most severe frosts, such a vest can be worn under winter jacket. Another option for an insulated men's vest - tweed . Thick material will keep you warm in cool weather. Can be worn with either a classic trouser suit or jeans.
Attention! When choosing a style, you should take into account the characteristics of the male figure. Wrap vests are not suitable for stocky men. Solo vests will look great on tall people.
Fabric selection
The selection of material depends on the type of vest chosen. Let's look at the most popular types of fabrics.

Wool fabric – made from natural animal wool. These can be sheep, merino sheep. The highest value raw materials are cashmere goat and Peruvian llama - alpaca. To reduce the cost of the material, cotton or synthetic fibers are added to the composition. This fabric has a high degree of wear resistance. Over time, it does not lose its aesthetic qualities. The wool content in the fabric structure may vary, but the more it contains natural fiber, the warmer the item will be.
 Knitted
The fabric is available in various shades and textures. Material with diamonds, stripes, large knitting is perfect for everyday vests. Its composition can be different: from synthetic fabrics to natural cotton and wool.
Knitted
The fabric is available in various shades and textures. Material with diamonds, stripes, large knitting is perfect for everyday vests. Its composition can be different: from synthetic fabrics to natural cotton and wool.
Advice! This season, vests in gray and burgundy shades are at the peak of popularity.
From tweed sew warm clothes. It contains wool fibers that will keep you warm in cold weather. The fabric is soft and pleasant to the touch. Its surface is covered with small fibers.
Advice! In order for a tweed vest to please you for a long time, and for the material not to pill, you need to choose fabrics made from boiled wool.
Shiny synthetic fiber fabrics with lining are not suitable for a solo vest. Biker jacket is sewn from genuine leather, you can also use its environmentally friendly analogues. To sew a masquerade frock coat, you need to stock up on brocade.
Taking measurements
Before you start sewing, you need to take your measurements correctly. The quality of the sewn product and its fit on the figure depend on this. To do this, you will need a measuring tape, a small piece of cord, a sheet of paper, and a writing object.
 Tie the cord around your waist: it shouldn’t dangle, but you shouldn’t tighten it too tightly either. Then start measuring the parameters, the person being measured should stand straight:
- Chest circumference – measurements are taken along the lower edges of the shoulder blades at the most protruding points of the chest.
- Waist circumference – measurements are taken through the narrowest point at the waist (along the tied cord at the waist).
- Hip circumference – measurements are taken at the widest point of the hips.
- Shoulder width – from the base of the neck to the edge of the shoulder.
- Front length to waist – you need to take measurements from the base of the neck to the waist line along the protruding points of the chest.
- Back length to waist – take measurements from the base of the neck to the waist along the back.
- Back width – the distance between the extreme points of the shoulders is to be measured.
Important! In order not to forget the parameters, record each measurement on a piece of paper.
Preparation of patterns
Let's take a classic men's vest as a basis. Its cut should match the model of the jacket and harmoniously complement it. Patterns from magazines do not give detailed description technology, the required size cannot always be found. Let's look at an example of how to properly cut a men's vest.
 To prepare a pattern for a classic men's vest, take a sheet of paper, or special graph paper for patterns:
- We retreat 7 cm from the top of the sheet and write X.
- From X, draw a line to the right parallel to the edge.
- From X we retreat down the length of the back to the waist. Add 1.3 cm for seams. We write 1.
- From 1 up, measure half the distance of the length of the back to the waist. It will be 2.
- From 1 down we retreat down 7.5 cm. This will be 3.
- To the right of 2 and 3 we draw horizontal lines.
- Divide segment X2 in half and write 4.
- From 1 we measure 1.3 cm to the right. We mark 5.
- Connect 4 and 5.
- From 5 we measure 1.3 cm to the right. We write 6.
- From X we retreat to the right 9 cm. This will be 7
- From 7 we retreat upward 2.2 cm. We write 8.
- At the intersection of the line 4 – 5 with 2 we write 9.
- From 2, set aside ½ of the chest volume to the right and add 7.5 cm. Write 10.
- From 10 we draw a vertical line. It should be parallel to the line X - 3.
- From 10 to the right we retreat 1/3 of the length between points 2 and 10. We write 11.
- From 11 we draw a line vertically up and down.
- We place 12 at the intersection of lines from 2 and through 11.
- Point 13 is located at the intersection of lines 10 and 1.
- To the right of 2, measure ½ of the back width to the right and add 1.3 cm. This will be 14.
- Draw a line up and down from 14.
- From 14 we retreat 2.5 cm down. There will be 15 here.
- Down from 11 we measure 2.5 cm and write 16.
- We mark segment 15 - 16 in half. In the middle we mark point 17.
- Draw a vertical line from 17, connect it with the segment 1 – 13.
- We put 1.3 cm to the right and left from 18. On the left we write 20. On the right we write 21.
- Through 17, 20, 19 and 17, 21, 19 we draw smooth lines.
- At the connection of X and 10 we write 22.
- From 22 we put 9 cm to the left. Here we mark 23.
- From point 10 we put 2.5 cm up. We write 24.
- We connect 23 and 24.
- Up from 15 we measure 15 cm. We write V.
- From 11 upward we retreat 15 cm. We mark S.
- We divide segment B - C in half and write D.
- We combine 8 and 9.
- From point 8 we put 10 cm to point D. We mark 25.
- From 23 we measure a length equal to the distance between 8 and 25. We put a point at 26.
- From 27 to the left we measure 5 cm. We write 28.
- From 28 we retreat 5 cm downwards. This will be 29.
Round off sharp corners. The pattern is ready.
Attention! Any vest is not fastened to the lowest button!
Assembling finished parts of the vest
 Once you've created the pattern, sewing the vest is easy.
- We lay the pattern on the fabric and carefully trace it.
- We cut out every detail.
- We start stitching from the middle seam of the back.
- Sew the side seams.
- By analogy, we build a pattern for the wrong side. We sew it from ordinary lining fabric.
- We iron each seam well.
- We apply the lining to the main fabric of the vest. Right sides remain inside. We combine the armholes, edges and pin them. You can sweep it away.
- We sew according to the markings.
- Cut the fabric. Left for allowances. Leave 1 cm of fabric at the seams. We carefully make small cuts along the armhole lines so that the fabric lies elegantly.
- Turn the vest inside out and sew the shoulder seams.
- The vest must be thoroughly straightened, ironed and basted around the entire perimeter of the product.
- On the left side we make markings for four loops. Their width depends on the diameter of the selected buttons.
- We sew each loop on a sewing machine. If you don't have a special tool for cutting loops, you can use a blade. You should work with it carefully!
- We combine the left and right shelves, sew on the buttons.
Important! We make all marks and diagrams of parts on the wrong side of the fabric.
Steam the product. The men's vest is ready, always be beautiful and elegant.
I have been ordered to sew a vest for the end of the 19th century.
Here is a sample of the basics of both cutting and tailoring: 
The vest ordered should be different in that the collar will be an English turn-down collar, i.e. only on the shelf, and the vest clasp will be much higher than on the sample.
I built the cut according to the construction drawing from the book for 1906 (page 34) 
The customer is very full (size so....62-64), and the fabric is plaid (tartan).
According to the cut and my idea, the cage runs parallel to the waistline.
But because The client's middle front line turns out to be much longer (arched due to the chest and abdomen) than the side line, then the check pattern at the top of the fabric begins to slowly slide down, which does not look very nice.
As a result, after trying it on, I ended up with these slacks on the neckline. 
How to remove them painlessly? (this is the first question)
Second:
I duplicated the shelf with adhesive doublerin. After sewing, the entire lining inside (not counting the lining and facing of the bottom of the vest) will be coarse linen.
But the back of the vest itself is thin linen.
Is it necessary to duplicate the base back as well?
The book says that the vest should fit the person exactly, but without darts.
I’m thinking of trying to iron the head (as I do in large products, because in this book the cut is already designed specifically for ironing).
Is it correct?
Post edited Vetag- Jun 26 2013, 17:31
Vest- this is an eternal classic. Arriving several centuries ago in the form of elaborate design solutions, it has forever remained in classic version V basic wardrobe any man.
Today we are looking at creating a vest pattern for a man.
Initial data
We make the construction using the base pattern we have already built shoulder product(see article “Pattern for the base of a shoulder product for men”). We transfer all the main contours of lines and points onto tracing paper, or load the drawing into the RedCafe program.
(1).Constructing a pattern for the front part
From t.A t.A1. From t.N put 2 cm down, put t.N1. We connect the resulting points with a straight line. From t.G draw a perpendicular downwards until it intersects with a segment A1H1 and to the right set aside 1 cm, put t.G1.
(2). We draw a new shoulder line. Omit the dots L,L1 2 cm down. Connecting the dots G1L1.

(3). Adjusting the armhole line.

(4). From t.S2 t.S3. From t.D1 to the left we set aside 1.5 cm and put t.D2. We set similarly i.e. E2. We get a new line.

(5). From t.D put 16 cm down and place t.F. From t.D set aside 3 cm to the left and place t.D3.

(6). From t.D3 put 20-22 cm up, put t.P and connect it with t.G1 smooth line.

(7). From t.D3 lower down 6-7 cm and put t.P1. From t.F set aside to the right 4 cm, put t.F1 and connect it with t.P1.

(8). From t.D2 put down 12 cm, put t.F2, connect it with a smooth line with t.F1. We put it on this line to the right of t.F2 2 cm and connect with t.D2.

(9). From t.G1 draw a perpendicular downwards until it intersects with the segment D3D2, put t.G2. From it to the right we put it 3-4 cm and put t.R. Up from t.R draw a line equal to the segment D3P and put t.R1.

(10). From t.R set aside to the right 3 cm, put t.R2, connect it with t.R1.

(eleven). From t.R1 through the middle of the segment RR2 draw a line until it intersects with a segment EE2, put t.R3. Connecting the dots R, R3, R2. Place dots on the line of intersection of the segments F3, F4.

(12). Thus, we get a pattern for the front part of the vest.

(13). Constructing a pattern for the back part
From t.A set aside up 2 - 4 cm, put t.A1. From t.A1 to the left we put a segment equal to the segment AG+1 cm, put t.G2. We put it up from there 2 cm, put t.G3. We connect it with t.A1.

(14). From t.D put down 12 cm, put t.F. To the left of it we put it aside 2 cm, put t.F1. From t.D set aside to the left 3 cm, put t.D2. Connecting the points with a smooth line A1,D2,F1.

(15). From t.S2 set aside to the right 1.5 cm and put t.S3. From t.D1 set aside to the right 1.5 cm and put t.D2. We set similarly i.e. E2. We get a new line.

(16). From t.F1 extend the line to the left until it intersects with the segment D2E2, put t.F2. From it we extend the line to the left by 2 cm, and connect the resulting point with t.D2.

(17). From t.N put 2 cm up, put t.N1. We move the shoulder line relative to t.G3.

(18). We continue the armhole line to the shoulder line, put t.L2.

(19). Along the line L2G3 from t.L2 postpone 4 cm, put t.L3. Connecting the dots L3,C3 smooth line.

(20). From t.D set aside to the left 13 cm and put t.R. On both sides of it we put aside 1.5 cm, put t.R1,R2. Up from t.R lay the perpendicular until it intersects with the segment CC3, put t.S4. We put it down from it 4 cm, put t.R3. Connecting the dots R1,R3,R2.

(21). From t.R lower the perpendicular down until it intersects with the segment EE2, to the sides of the perpendicular we set aside 1.5 cm and put dots E3,E4.

(22). From t.G3 set aside along the shoulder line 6 cm, put a point, then further postpone from it 1cm,
Congratulations! Men's vest pattern ready!


