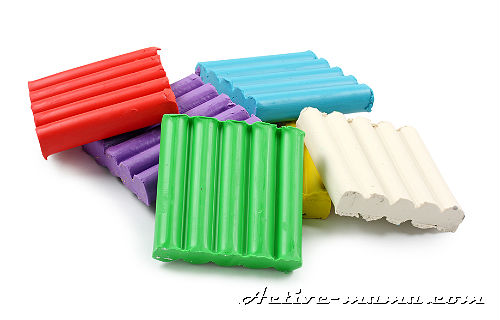
What to model from plasticine. How to sculpt from plasticine with your child. Master class on making a Christmas tree from plasticine
Galina Khorosheva
Subject: “We are not wizards, we are just learning”
Tasks: - Training in skills to work with plasticine: learning new techniques (rolling, pressing and spreading);creating story pictures using new techniques.
Formation of interest in modeling.
Learning to navigate on a sheet of paper.
Development, fine motor skills.
Speech development.
Familiarization with the surrounding world.
Development of emotions and fantasy.
I have been working with young children. From my work experience, I know that developing a child’s hand, namely the fingers, must begin from early childhood. The development of hands plays an important role in the development of the brain, its cognitive abilities, and the formation of speech. Modeling contributes well to this.
My kids really like it sculpt. We have a choice of materials for sculpting: plasticine, salt dough, space sand. We making treats for dolls: gingerbread cookies, sweets, rolls. For guests (bunnies, squirrels, birds) carrots, nuts, grains. Different items: airplanes, pyramids, balls, Christmas trees and much more. To revitalize and decorate objects, we use seeds, various cereals, small pebbles, and fruit pits. All items are based on ovals (sausages) and balls that we roll out with straight and circular movements of the palms. We learn to modify lumps with our fingers and connect parts.
Sculpt possible and necessary not only in kindergarten, but also at home. The child will be next to mom and dad sculpt with pleasure, and will definitely show and tell you what he has learned.
Sculpting is great, I would like to advise our parents sculpt with children at home. Start with simple items, like we did children and be sure to play up what blinded, tell a fairy tale, any story.
I wish you all creative success!


Publications on the topic:
In our group we planned a conversation with the children of the preparatory group on the topic “The Red Book”. Why was the “Red Book” created?
Autumn is a wonderful, bright time that promotes imagination in crafts with children, the development of creativity, and the use of different things.
Questionnaire for parents “Playing with children” QUESTIONNAIRE FOR PARENTS “PLAYING WITH YOUR CHILDREN” Dear parents! The purpose of the questionnaire is to generalize and consolidate ideas about the game.
I wrote about my family in previous publications! I have two sons and as soon as my boys started growing up, I realized that I had to.
Consultation for parents “Play with your children” Parents know that children love to play and encourage them to play independently.
Consultation for teachers “Creative activities with children” Creative activities with children. Solving the problems of the program and achieving its main goal is closely related to our collaboration with the children.
I work at the Harmony early development school. My girls love to sculpt. We came up with the idea of making our own decorations with our own hands.
At this age, children are already good at rolling koloboks and sausages, pinching off, smearing and flattening plasticine. However, plasticine crafts with many small details, which can be found in popular children's modeling manuals, are not yet possible for them: as a rule, they lack either patience or motor skills. In this article you will find ideas for modeling that a 2-3 year old child can cope with with minimal help from his mother. After all, independence in creativity is extremely important for a child! Try to always remember this while teaching your child.
Activities during which the mother does most of the work for the child do not in any way contribute to creative development. Allow your koloboks to be crooked and your eyes to be in a completely different place than you would like them to be. Do not demand ideal forms from your child, achieving a strong resemblance to real objects . If it is very difficult for your child to cope with the task, it is better to simplify it (By the way, you can find ideas for simpler plasticine crafts for children in the article “ Modeling for children 1-2 years old »).
It seems to me that the ideal activity is when everyone makes their own craft: for example, the mother makes her own snowman, the child makes his own, while the mother comments on her actions, and the baby is guided by what the mother is doing. In our experience, closer to 3 years this becomes possible. But the smallest creators often do not have enough finger strength to cope with plasticine, so, of course, sometimes they need help, but at the same time they should always strive for independence in creativity.
Don’t be confused by the fact that the crafts in the photographs in this article are smooth and neat and do not at all look like children’s crafts; I specially made most of them for this article, because... what we sculpted with my daughter mostly did not survive. After all, having molded some figure, Tasya immediately includes it in her game. And not all of Tasya’s crafts would make it clear to readers what was originally intended
So, ideas for modeling with children 2-3 years old (or rather, this is only half of the ideas, here is the continuation).
Making treats for toys
You can start the lesson with something like this: the bear came to visit the hare, they gathered to drink tea, but there was nothing to drink it with. The baby will have to help the toys and make treats for them. You should not make more than 1-2 types of treats at a time, otherwise the child will get tired of the protracted activity.

- Bagel and pretzel . First we roll the sausage. To make a bagel, we connect the ends of the sausage to each other, in the case of a pretzel, we slightly cross the ends.
- Candies . Roll out a small plasticine sausage and attach small balls to the edges.
- Pie . First we roll a large bun, then flatten it. Fold the resulting flatbread in half and pinch the edges.
- Eggs on a plate . Roll a large bun, flatten it, level it with your fingers - you get a plate. Then we roll small balls and put them on a plate - these are eggs.

- Apples . We roll the balls and make small indentations in them with our fingers. Then we attach small leaf cakes to the recesses.

- Mushrooms . We roll the bun and flatten it - this is the mushroom cap, we roll the column - this is the leg. Mushrooms can be put in a basket, “collected in the forest.”

Candies with candy wrappers
. We roll small sausages or balls, and then wrap them in prepared pieces of colored paper or foil, like in a candy wrapper. Most likely, you will have to help the baby wrap the candy, because... this task is not easy. Just be careful that your baby doesn’t eat this candy, it looks too much like the real thing!

- Pie/cake/pizza . First, we make a large bun and flatten it into a not too thin flat cake - we get the base for a cake or pizza, whichever you prefer. Then we decorate with everything we have on hand: beans, pasta, peas, buckwheat or any other cereal.

Crafts based on “koloboks”
- Snowman . We roll three koloboks, which we then carefully mold together. We make the eyes and mouth in a stack. The nose can be made into a stack, or you can make a carrot nose with your mother’s help.
- Tumbler . We roll two balls and mold them together. We roll two small buns separately and attach them to the sides as hands.

- Caterpillar . We roll small balls - as many as you have patience for. In my opinion, it’s best to make a caterpillar together: the baby makes a few balls, the mother makes a few, and then combine everything together. We make the face in a stack. Attach horns if desired.

- Christmas tree . I mentioned this craft earlier in the article “ New Year advent calendar" For this craft you will need a pine cone, which will be the Christmas tree. The toys on our Christmas tree will be small plasticine balls, or simply pieces of plucked plasticine. At the end of the lesson, mom fixes the Christmas tree on a plasticine base so that everyone can admire it on the eve of the holiday.

- Kolobok . The baby, of course, has rolled the bun more than once. This time, invite him to make all the small details from available materials. For example, our little bun has eyes and a nose made of peas, legs made of beans, and a hat made of buttons.

Crafts based on “sausages”
- Fence for a house . First, we roll multi-colored plasticine sausages, and then stick them one to the other near the drawn or any other house. In the photo, my daughter and I were “attaching” a fence to the house, which the day before had been glued together from multi-colored blocks painted with patterns.

- Airplane . Roll two sausages and place them crosswise. If you wish, you can also attach another small sausage to the tail of the plane for greater resemblance.

- Hut for a bunny. This craft can be made immediately after reading the fairy tale “Zayushkin's hut » ( Ozon , Labyrinth , My-shop ). Draw a bunny, a forest, and maybe other fairy tale characters in advance, explain that for some reason there is no hut in your drawing, and offer to make one out of logs. The logs will be plasticine sausages. Place a window on top of the resulting log house - a flat cake. A triangular roof can be made from a regular flat cake by stretching out the corners with your finger.

- Pyramid . First we make the base for the pyramid (cake). We attach a column to it in the middle. Next we roll a few rings together. To prevent your child from getting bored with the activity, you can make rings together: 2-3 rings for the child, 2-3 rings for the mother. When all the rings are ready, lay them out on a modeling board and determine in what order to string them onto the pin.

· Whale . To make a whale, first we roll a large bun, then on one side we pull out the tail with a pinch, on the other side we cut through the mouth with a stack. Eyes can be made either from small plasticine balls or simply by making small dots in a stack. A wonderful fountain will be made from a cocktail tube. Prepare in advance and make several cuts on a piece of tube with scissors.

- Snail . First, we roll out a long sausage, trying to roll it as long as possible. Then, together with the baby, we twist the sausage into a spiral - the snail is ready! You can also attach small horns.

- horse . Here you should get something like a Dymkovo toy. In the photo, it seems to me that the craft did not turn out very beautiful, but this is the easiest version of the horse. So, first we make a thick column and bend it into an arc. Then we roll a small bun, it will be the head, so we attach it to the appropriate place. Next, use your fingers to draw out the tail and mane. If desired, we make stacked stripes on them for greater similarity. And of course, eyes, mouth, nostrils.

- Hedgehog from a cone . First of all, roll out the bun again. We place it on the bump and stretch the plasticine with our fingers, trying to secure the hedgehog’s head to the bump. Hold your baby's bump to make it easier for him to smear the plasticine. Then we form a muzzle with a pinch, and make a nose and eyes from the balls. You can also attach several apple balls to the hedgehog's needles.

- Mouse . First, we roll the rounded body and separately the tail - a tiny sausage. In the place where the head is supposed to be, we pull out the nose and ears with pliers. You can attach a small black ball to the tip of the spout. Well, on the opposite side we attach a tail.
- Bunny. Here the child is again required to roll only koloboks and sausages.

- Goose . We roll a large round body, use our fingers to stretch the neck out of it, preferably longer, bend it slightly - we get a head. Make eyes in a stack. Pull out the tail from behind with a pinch. At the bottom we attach two small cakes - these are the paws.

- Birdie . We make the bird's head from a ball, and the body from a small column. Use pincers to form the tail and beak. Make eyes in a stack. At your next modeling lesson, you can make a nest for the bird. To do this, you will need to roll as many long thin sausages as possible. And, placing the “branches” crosswise, make a nest. The edges of the branches must be pinched.

- Snow Maiden . For this New Year's craft, you will need to prepare a cardboard cone in advance - this will be the Snow Maiden's fur coat. Next, to make the cone turn into a Snow Maiden, we add all the necessary plasticine parts together with the baby. We make a edging of a long sausage onto the fur coat, attach buttons, handles, and a hat. You can also add a scarf, braid and other details that you have enough imagination and patience for.

- Little man.

- Furniture . It is very simple and interesting to sculpt furniture from plasticine - it can immediately be used in a small story game. All elements of plasticine furniture are very easy to make - for the most part they are just flattened columns and koloboks, i.e. something that a 2-3 year old child has already mastered well. The inhabitants of your plasticine room can be either small plastic toys or previously sculpted plasticine men.

In general, I adore plasticine because you can mold almost anything from it. If something is missing for the game, plasticine always comes to the rescue. If you don't have enough doll dishes - please, an airplane - no problem. Everything that a child is currently interested in, be it dinosaurs or horses, can be easily sculpted, albeit in a simplified form. And don’t be afraid that it won’t turn out the same. No matter how much we sculpted crooked and slanting horses, swimming goggles and other toys, they were always very dear to Taisiya, and she found it much more interesting to play with them than with real toys. It is very important to always show your child that you can make anything out of anything. This is how the baby develops imagination and a creative approach to solving problems.
Well, in the photo there are plasticine swimming goggles, fashioned for the monkey Chupa during the period of our great love for the pool and swimming goggles in particular.

With this I say goodbye. See you on the blog pages!
Like
Very often, parents are wary of such creative materials as plasticine. And all because it can stick to the floor and furniture, leave greasy marks, or the young sculptor will manage to simply swallow it.
At first, adults explain their negative attitude towards plastic material by the young age of their children and their gastronomic interest in everything around them, especially colorful and soft ones, and then they refer to other interests, arguing that such fun is for kids. If you agree with this opinion, then you probably yourself became a victim of the older generation and you were not taught to love plasticine. Allow yourself to break out of the routine of everyday life for a few minutes and experience the magic and magic of modeling clay with your own child.
Modeling from plasticine for children: a rainbow of positivity
Believe me, you can give a little person a whole kaleidoscope of positive emotions that neither applique nor pencils can replace. Unfortunately, mothers and fathers forget that the joys of creativity and the safety of the baby depend on their ability to teach, explain, and interest.
Plasticine is a truly unique material. Remember how your baby wants to knead and smear something, and food comes to the rescue. Your prohibitions and indignations about this are absolutely understandable. Try offering him some plasticine. Of course, after having a conversation with him and feeding him tightly. There will be no limit to delight.

Plasticine develops perseverance. Follow the hands of the clock while the young sculptor creates from soft colored blocks. Active work of the joints and muscles of the hands increases blood circulation, replacing professional massage and stimulating development. Brain activity is activated, coordination and speech develop. Imagination and fantasy are activated, perception of form appears, attention to detail and, most importantly, independence.
 Photo: depositphotos.com
 Choosing the right plasticine for children's crafts
Modern manufacturers offer a huge range of plasticine from the usual hard blocks to small balls in the adhesive mass. It is impossible to answer unequivocally which material to choose. It all depends on the age of the creator and the purpose of the purchase.
Good plasticine for modeling with children is characterized by elasticity and pliability. It rolls easily with your hands and on any surface. The plasticine product should not fall apart into its component parts. The material should not crumble even after hardening and quickly restore its original properties. When exposed to heat, the mass melts, leaving greasy stains that are easily washed off with soap and water. The composition of ordinary plasticine includes clay powder, dye and substances that prevent the mass from drying out (fat, wax, ceresin, etc.)

Pay attention to the manufacturer; domestic creativity kits are much cheaper than imported analogues that do not differ in characteristics. However, imported plasticine has richer and more varied shades, and sometimes pleasant aromas.
Plasticine should not contain synthetic and harmful additives, crumble, dry out and leave stains that are difficult to wash off on your hands.

The properties of the material and the age of the child play an important role. So, the baby has no need for sculptural or hardening plasticine, he cannot cope with it, but he will appreciate the bright, odorless material that does not stick to the floor and hands.
For drawing with plasticine, you should give preference to softer samples. The hardening and sculptural material is suitable for older children; it will not only allow them to show imagination and skill, but also preserve their creation. Luminescent, shiny and color-changing material will surely captivate any sculptor and encourage him to new achievements.
Plasticine for the little ones
Already at one and a half years old, you can offer the baby a magical substance called plasticine (before this, it is better to use it for modeling with the child). But the main thing is to accustom him from the very beginning to work with him in a certain place, at the table. Mom doesn’t want to collect crushed pieces all over the house.
Start with color. Which one will he like best? Let me crush it and roll it out. Sausages, balls, cakes can later turn into a caterpillar, snail, pyramid, well, fungus. A pair of eyes and a smile will turn an ordinary plasticine ball into a character from a fairyland. Several such heroes - and you can teach the baby how to properly build a dialogue and answer the questions posed. Kids love to leave imprints on plasticine with their fingers or some figures, caps, spoons, or pencils.

So, we sculpt from plasticine with young children. Roll up a thick sausage and decorate it with seeds or rice and the funny hedgehog is ready to work collecting colorful mushrooms. Revive a dry branch by making leaves and flowers for it.
Study geometry using plasticine figures and explain their properties to your child. For example, a ball can roll, and a cube has edges, so it is stable; a cone has a spiky nose and a circle at the base - it looks like a Christmas tree. As your child becomes familiar with shapes, periodically ask him to show him a cube or a ball. The most important thing is a competent approach, and you will form a stable platform for starting into the difficult world of geometry. Model animals from plasticine and tell your little one that a bird has a beak, paws and feathers, and a tiger has a mouth, paws and claws.

We should also talk about ball plasticine. This is a unique educational material. In addition to its plastic properties, it is pleasant to the touch, small balls allow the child to feel the shape, it is lightweight and does not stick to the hands at all. The hardening material will allow you to save your baby’s first crafts as a keepsake. An adult can make the frame of some sculpture from foil or paper, and the child will stick plasticine around it. Work out small details together.
Children at this age absorb information like sponges, and if at first glance it seems to you that the child is not interested in this and does not remember anything, you are mistaken. He leaves everything he hears somewhere in the subconscious and, if necessary, will definitely use it, even after a long time.

It will be difficult, but when sculpting from plasticine with children, try to follow one most important rule - give the young sculptor complete freedom. Don't rush to fix unsightly sculptures. Praise the creator, encourage him and give him unobtrusive advice.
We sculpt from plasticine with children of preschool and primary school age
The most talented imagineers and plasticine masters emerge between the ages of 3 and 7 years. It is at this time that the baby has the richest imagination, which is not yet limited by the boundaries of school and adult life. They quickly turn all their impressions into plasticine sculptures. While an adult is thinking about what can be made from plasticine, looking at the palette of plasticine blocks, the young sculptor quickly creates something that would be difficult for an adult to imagine. And here the main thing is to get the sculptor to talk. Let him tell you about what he made. This will help teach your child to express his thoughts correctly, increase his vocabulary and allow him to feel your genuine interest in his work.

Ideas for modeling from plasticine for children
So, we sculpt from plasticine with preschool children. Try to mold the characters of his favorite cartoon by placing an image in front of you and notice how the child begins to notice little things that he would not have paid attention to before.
Absolutely everyone: both girls and boys, are in awe of castles. Buy hardening plasticine, a larger hard tablet and build together a palace with its entire retinue, outbuildings, weapons, animals, a prince and princess.

Of course, modeling clay is a little more expensive than usual, and a large-scale project may not be cheap, but the game is worth the investment. Do not buy a large batch of plasticine at once; a couple of sets per month is enough. The main thing is to encourage your child to pay attention to details. Don’t build walls from “pancakes”, stack them brick by brick, sculpt people proportionally, paying attention to the body structure of representatives of different sexes, dress them in exquisite clothes. By the way, they can be sewn from fabric, this will inspire the prospector even more. After construction is completed, don’t lose interest in the craft: make a short film, at least on your phone. This can be imagined as work for a now fashionable portfolio for school or kindergarten.
 DIY plasticine circus. Photo: depositphotos.com
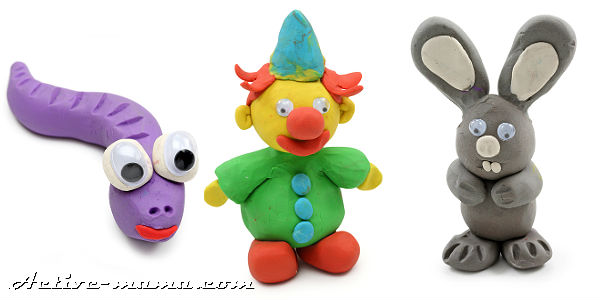
Older children will appreciate the hardening plasticine. They won't be able to resist the opportunity to make keychains, jewelry, pencil holders and other little things.

Drawing with plasticine
Who said that you can only sculpt from plasticine? It is an excellent paint replacement. Pictures from it come out as if they were alive, and the creation process gives young artists a lot of pleasure.

Plasticine does not flow like watercolor, does not leave uneven strokes like pencils, crayons and felt-tip pens, and you need to draw with your finger, feeling the picture. Draw an image on a sheet of cardboard and fill it with plasticine, teach the artist to mix several shades, for example, grass combines several shades of green, yellow, orange, brown. In this regard, plasticine is a very grateful material; it seems to feel the artist’s desire and mixes perfectly.
 Photo: depositphotos.com
 In addition, in a plasticine painting the image is conveyed not only through color, but also through shape. Bulges, depressions, stripes drawn with special tools seem to breathe life into the picture.

Drawing with plasticine on glass is a little different; here you need to pay special attention to the mirror effect. That is, what is in the foreground is sculpted first, and so on layer by layer. All that remains is to add a velvet colored background - and the masterpiece will be as presentable as an oil painting.
 Photo: depositphotos.com
 How and where to store children's plasticine crafts?
The melting property of plasticine makes it unreliable for long-term storage. To organize an exhibition, it is best to use the coolest place, which is not exposed to direct sunlight, or glass, which will protect the work from dust.
 Photo: depositphotos.com
 Whether it’s paintings or just crafts, to give them temporary durability, you can coat the work with varnish, but only intended for ceramics, which can be bought in specialized stores. Cling film will replace glass for decorating plasticine paintings.
 Photo: depositphotos.com
 Demonstration stands are often set up in schools and kindergartens. Story-based works look brighter and more colorful; if children are not yet independent enough to act out a plasticine action, then adults will have to make a background and place the works of young masters on it, like characters. By the way, the background does not have to be made of plasticine; it can be drawn or made from improvised and natural materials.
 Photo: depositphotos.com
I would really like to once again ask adults not to deplete the fairy-tale world of childhood and give the child a box of plasticine, because unlike other toys it does not get boring, it is different every day, one block can be transformed more than a dozen times. And ask mothers to save the brightest children's crafts made from plasticine. There will not be many of them and a cardboard box located under the bed will be enough. After a short time, you and your now adult son or daughter will look into this magical chest and remember the funny or sad moments. The child will definitely appreciate his mother's attention. Get creative and have fun modeling with plasticine with your children.
 Photo: depositphotos.com
 The material was prepared by Olga Churkina and her daughter Varya especially for the site
A great option for spending an interesting and useful evening with your child would be to practice modeling. It’s not for nothing that modeling from plasticine is included in the curriculum in kindergarten and elementary school lessons. For kids 2-3 years old, of course, it’s a little difficult to knead large pieces of plasticine in weak hands. However, already at this age, modeling will serve as an excellent way to develop fine motor skills. Children at this age can be asked to roll out small balls or make small crafts from special soft dough.
But for children of senior preschool and primary school age, working with plasticine is simply necessary to strengthen the muscles of the hand, and therefore to master writing skills, as well as to develop creative abilities. Together with your child, you can make unusual crafts, funny animals and other figures, or “draw” a plasticine picture.
And while modeling from plasticine, you can practice various geometric shapes or repeat the names of colors and body parts in English.
What are the benefits of modeling?
Modeling is one of the most accessible types of creativity for children, starting from a very young age. From the age of two, you can use a special soft dough for modeling or make your own salt dough for these purposes.
For older children, plasticine helps them embody their vision of the world and their ideas about it into something concrete. The child not only creates something, but also touches it, changes it if desired, and gets a completely new result. In addition, in the future you can even stage small performances with the resulting toys. This means that the child will be able to come up with not only specific images, but also entire stories with them.
So, while modeling from plasticine you can develop:
- sensory sensitivity, which includes the perception of weight, size, shape and texture of objects;
- fine motor skills of hands;
- imaginative thinking and fantasy;
- synchronization of the work of both hands;
- perseverance, the ability to plan one’s activities in order to achieve a specific result, analyze and, as necessary, change the resulting figure.
All these skills and abilities will definitely be useful to the child when studying in primary school.
Basics of plasticine modeling
Before a child can start working with plasticine on his own, parents need to show by their own example several basic modeling techniques:
- warming up and kneading the material, when it is necessary to press the plasticine with your fingers or palms, as if kneading it;
- pinching, which can be used to separate several small parts from a larger piece;
- so-called spanking, when you just need to pat the plasticine with your hand with a tense palm and straight fingers;
- flattening or squeezing a piece of material in the hand to give it a different shape;
- rolling plasticine into a ball with your palms;
- rolling into a sausage.
With the help of these actions, the child will learn to knead the material and make various figures from it, and then connect them together.
After children learn to create simple shapes and work with materials, they will probably become interested in how to sculpt animals from plasticine. To begin with, you should choose simple representatives of the fauna, with a minimum number of details.
For example, for the youngest children, a caterpillar figurine is perfect as one of the first figures to sculpt. To make it, you just need to roll several multi-colored balls and stick them to each other. And while rolling out the balls, you can also repeat the names of the colors in English with your child.
We sculpt from plasticine - repeat English words
For example, this funny caterpillar consists of balls of green, orange, purple, yellow, and its eyes are made of circles of black and white plasticine.
Older children can try to create characters from “Smeshariki” themselves, since they are all created according to the same principle: a spherical body, oval legs and individually selected details (ears for Krosh, needles and glasses for the Hedgehog, horns for Losyash).
The child must be warned that plasticine should not be put into the mouth, no matter how tempting the ready-made strawberries or cakes may seem. Since plasticine can leave behind greasy marks, you need to work with it on a special board and use an apron for creativity.
You can try to make a whale or an octopus. The shapes of these animals are very convenient for modeling lessons with a child. At the same time, you can repeat the shapes (ring, ball) and parts of the body of an octopus (octopus [ˈɔktəpəs]) in English (torso - body [ˈbɔdɪ], tentacle - tentacle [ˈtɛntəkl], eyes - eyes, mouth - mouth).
To make an octopus, you first need to roll a ball of the desired size from blue or purple plasticine, and then give it the shape of an egg, pulling it in one direction. Separately, you need to make eight tentacles by rolling plasticine into sausages, which become pointed at the end. Then these pointed tips need to be rolled into a small ring. Another rolled out sausage turns into a base ring for an octopus figurine. The tentacles are attached to it. The eyes on the body are made from small balls, flattened into small cakes of white material. The octopus's mouth is drawn with a thin stick directly on the sculpted figure, and the pupils are made from small black peas of plasticine.
How to make an octopus from plasticine step by step can be seen in the picture below.
Other materials for modeling
If necessary, plasticine can be replaced with other materials for modeling, both purchased and those that can be easily made at home. It is especially important to highlight modeling dough, which is as convenient and practical as plasticine, and it is much easier to find than other materials.
- Choosing dough for modeling
In the store you can buy special soft dough for modeling, which in its composition and properties is very similar to homemade salt dough. But, of course, it is best to choose high-quality purchased dough from well-known manufacturers. It is not only suitable for the youngest children (2-3 years old), but also simply amazing in the variety of colors - it is very difficult to achieve such a palette on your own.
True, unlike plasticine, soft dough dries very quickly in the open air. Therefore, after work, it must be placed back in the box in which it was sold. - Making figures from salt dough
Salt dough is one of the most accessible and simple materials for modeling.
You can easily prepare it at home using one of the existing recipes.On a note
In the simplest recipes, it is enough to mix flour and salt at a ratio of two to one (two parts flour to one part salt), then add the amount of water necessary to create a homogeneous mass. You can tint the salt dough either with food coloring or with natural beet or carrot juices. - What can you make from clay?
Children of senior preschool and school age will be able to make from clay not only figurines of their favorite characters, but also real cups and pots. Moreover, today it is not at all necessary to dig clay for modeling somewhere in a quarry, but can be purchased in craft stores. But still, clay is not plasticine; working with it requires some skill and skill.
However, today there are many master classes on making clay products, which children also enjoy attending. After firing the clay product, the child can decorate it to his liking, thereby developing his creativity and fine motor skills. - We use other materials for modeling.
A rather unusual material is ball plasticine (light and unusual, consisting of tiny foam balls glued together) and the so-called “chewing gum” for hands (can be a mass for modeling, the basis for a bouncing ball, or can even “spread” , if you just leave it on the table).
Also, starting from the age of 4-5, children will already be interested in entire play sets with “sand” for modeling, products from which do not dry out, but lose their shape if they are not baked.
In general, modeling from plasticine or from any other suitable material is a wonderful activity for a child, the main thing is to captivate him and give him freedom of imagination and the opportunity to choose suitable materials.
Making an octopus from plasticine
Consultation for parents
“We sculpt together with the children”
Modeling from plasticine for children is not only fun and exciting, but also a very useful activity. The importance of modeling in a child’s development cannot be overestimated. Modeling has a beneficial effect on the emotional state of a child and is one of the means of understanding the world and developing perception. Babies get excited about everything they touch that is of interest to them. A child learns about the world visually, often through his feelings. Indeed, in every craft, in addition to raising your spirits and getting joy from joint activities and communication, modeling from plasticine can give much more than we think.
Here are just some of its advantages:
Playing with plasticine promotes the development of fine motor skills and coordination of movements, which has a beneficial effect on the child’s speech development. After all, the more he works with his fingers, the faster he develops, the better he speaks and thinks.
Modeling from plasticine promotes the development of fantasy, imagination, and reveals creative potential.
When modeling from plasticine, the fingers and palms of the hands are warmed up - and this is brain development and even disease prevention!
The benefit of plasticine lies in the modeling itself, and not in its result. It is important that the baby crushes the plasticine, tears off pieces from it, and rolls them between his palms.
What is plasticineography?
This is a new type of decorative and applied art. It represents the creation of stucco paintings depicting more or less convex, semi-voluminous objects on a horizontal surface.
Every person knows such a soft and pliable material as plasticine, which can take a given shape. But not everyone knows that you can not only sculpt from plasticine, you can also draw with it.
Nowadays, many types of plasticine of different qualities are produced. It is important that plasticine and modeling pastes are safe for children. Therefore, I advise parents of their students to buy plasticine that is made on a plant basis, without harmful additives.
Modeling material
There is a wide selection of all kinds of materials for modeling. First of all, this is plasticine, which has different qualities, as well as different types of clay and plastic. For modeling with children, the most suitable material is plasticine, as it is soft, flexible, has many colors and can be used many times.
Plasticine is made from purified and crushed clay powder, with the addition of lard, wax and other substances that prevent the material from drying. Initially, in industrial production there was only gray plasticine, later paints began to be added to it, and now we can see a variety of all possible shades.
There are several types of plasticine:
- Ordinary children's plasticine on a clay and wax base.It is best suited for working with small children, since the wax contained in plasticine makes the mass pliable and can be easily kneaded by children’s fingers..
- Fluorescent plasticine.It has bright, rich colors. This plasticine repels water well and glows in the dark.
- Ball plasticine.It consists of many small balls that are connected to each other by a harmless adhesive mass. The surface of crafts made from such plasticine is grainy, which allows you to hide minor defects in the figure. The colors mix easily with each other. Ball plasticine comes in three types: coarse-grained non-hardening, coarse-grained hardening, fine-grained.
- Floating plasticine.This type of plasticine does not dissolve in water, does not dry out, and is suitable for repeated use. You can make boats, sea creatures, etc. from it. In order for crafts to float better on water, it is recommended to make them with a wide base.
- Smart plasticine.This type of plasticine is unique in that it takes any shape and changes its state as a result of kinetic influence. It can be crushed, cut, stretched. If you hit such plasticine on the floor, it will bounce off like a ball. It is odorless, does not stick to your hands, and can be washed.
- Sculptural plasticine.It has excellent plastic qualities. To make sculptural plasticine, a wax mass with the addition of mineral pigments and fillers is used. Suitable for working on individual parts. Its structure is harder than ordinary plasticine, so it is not very suitable for working with small children, since it is problematic for them to knead a piece of such plasticine.
Little artist's workplace
To create a creative atmosphere and at the same time accustom your child to order when working with plasticine, it is necessary to organize his workplace.
There should be nothing superfluous on the table where the child will work, except for those materials and tools that he may need during the modeling process. Mandatory accessories are: material (plasticine), work clothes, board and stack.
Primary requirements:
- In order not to stain the table with plasticine, it should be covered with oilcloth and newspaper. In this case, the child must work on a special board, which not only protects the table, but is also an important working tool.
- The workplace should be well lit so that the child does not strain his eyes and thereby spoil his vision.
- To protect clothes while sculpting, it is best to put a special apron on your child or use clothes that you don’t mind getting dirty.
- To prevent the plasticine from sticking to your hands, they should be slightly damp. To do this, place a cup with a small amount of warm water on your desktop and place a cloth next to it.
Now let’s look at some tips for stimulating the development of a child’s creative activity:
1. Always sculpt in a good, friendly environment;
2. No criticism towards the child, only good wishes;
3. Develop his curiosity;
4. Encourage new, original ideas;
5. Use a personal example of a creative approach to solving problems;
6. Be sure to give your child the opportunity to ask questions, and actively.
What games can you play using plasticine?
Every mother can easily come up with many games for her child, taking into account his age and modeling skills. Here are examples of simple games using plasticine that you can try. Some of them can be played from the second year of a child’s life.
1. You need to take a piece of thick paper or cardboard, draw a blank on it (for example, a tree) and seal it with transparent tape on top. Make apples from plasticine and “hang” them on a tree with your child. Covering with tape will make this blank reusable, since after the end of the game the apples can simply be removed from the surface. You can paint over patterns with plasticine - a cucumber, an apple, a pear and then play “Where does it grow?” (both in the garden and on the tree).
2. If the baby doesn’t yet know the colors, constantly call them while sculpting: “We’ll make an apple from red plasticine. Now give me a piece of green plasticine - it will be a leaf..."
Take 5 small pieces of plasticine in red, yellow, blue, black, white. With their help you can build the entire color palette. First, connect the primary colors in pairs, show how two-color lumps turn into green, orange, and purple balls. Mixtures of white and black will add lighter and darker shades to the palette. Experiment with different mixtures and proportions with your child. With an older child, stick pieces of plasticine onto cardboard and connect each color with lines to the colors that participated in its production. Tell and demonstrate that if you mix all the colors, you will get an ugly, dirty gray or brown piece. To prevent this from happening, let your child help sort the plasticine by color at the end of each lesson.
3. Themed games made from plasticine. The theme of the game can be anything: “Making a zoo”, “Making fruits”, “Making geometric shapes”, “Making flowers”, etc. You can choose any theme for your games with your child. It depends on your imagination and the development of your child.
Modeling classes cultivate patience, perseverance, accuracy, the ability to plan and bring the job started to the end. All these skills will be useful not only at school, but will also help the child become harmonious and
Working with plasticine should bring joy to children!
Often, at home in the family, children do not have materials for independent artistic creativity (plasticine, paints, colored pencils, coloring books). Parents themselves do not pay attention to creativity, do not have the skills, and do not teach their children how to work with visual materials. You should not practice plasticine for a long time, no more than half an hour, so that the child does not get bored.
In conclusion, I would like to note that modeling is an important activity for children, which develops creativity and has a beneficial effect on the nervous system as a whole. The benefits of modeling are enormous.
Sculpt with your children, sculpt more often, sculpt with joy, sculpt for health!

