We make Christmas tree decorations and New Year's decorations from papier-mâché. Christmas toys made from papier-mâché Mk New Year's toys made from papier-mâché
“Children for the Christmas tree”: making cotton Christmas tree decorations.
Master class by the wonderful author ChirunArt or “Dolls Live Here”:
Master class on cotton wool Christmas tree toy. These toys are made using the ancient “cotton wool + paste” technique, using various tricks. I hope that this information will inspire you to make your own unique toys that will delight you and your children for many years.
So let's begin.
For work we will need the following materials and tools:
1. Cotton wool (cotton, homogeneous).
2. Wire (I have knitting wire from a hardware store, but it’s better even thinner and simpler, we will need it for the skeleton; frame).3. Potato starch.
4. Pva.
5. Foil (ordinary, whatever you can find. I have it for cooking).
6. Stacks (Very convenient with balls, rounded, sharp. Will be needed for small parts, face, mittens, cuffs...).
7. Shilo.
8. Watercolor paints.
9. Acrylic paints.
10. Glitter (sparkles) dry white.
11. Varnish in a can. (hairspray will do).
12. Rope (gold or silver for the loop).
13. Threads (ordinary cotton white or light threads).
14. Long needle. It will be needed to thread the string into the finished toy. (I have a set of needles for toys).
15. Brushes (of different sizes, for painting).
That's probably all the materials. I would like to note that everything is quite affordable, and you will not have any difficulty finding and purchasing it all.
I will be making a New Year's "Company" for the Christmas tree.
We take the wire and begin to twist “Skeletons” out of it.
On one main one we twist the legs, arms, ears. It should look something like this:
Next, we begin to add volume with the help of foil, and add movement to our figures.
Already at this stage, the outlines of future toys are visible. In this case, it is a bunny.


We do not spare foil; we wrap all parts, arms, legs, ears properly. It should cover the wire and fit very tightly to it (crumple it so that there is no excess air left). And don’t forget to form a pose for each toy (bend the arms, legs, and maybe tilt the head).
This is what my preparation for the future cockerel looks like:
Now we begin to build up “muscle mass”, volume, by applying pieces of cotton wool, and wrap (fix) with white threads. It’s convenient for me to add wire for the tail. Like this:


At this stage I added the missing length on the arms (wire).
And again we wrap it with cotton wool and secure it with threads.
There is no need to rush at this stage, because the more carefully the shape is worked out, the easier it will be to work with wet cotton later. Therefore, we look again and add if anything else is required. We don’t skimp on the threads either.


We use the same principle to make the bunny and the rest of the kids.
And the future baby squirrel.
Here are these wonderful three cockerels:
And the rest of the preparations. At this stage, you can still adjust the pose, turn the head, or make the arms more expressive. From the top row from left to right: A bunny, a fox, a squirrel, a hare and three cockerels.


Now let's go to the kitchen to cook the paste. We will need: water, potato starch, pva (not a lot at all). I do everything by eye :) Pour water, heat it up. In the meantime, dilute a small amount of starch (1-2 tbsp) in cold water and add it to our hot water. Then cook, stirring constantly, like regular jelly. It should not be very thick, but not runny either. If you see that it is thickening very much, add water. Then cool until warm, add a little PVA and get to work. (My advice is not to cool it too much, because cold paste is not very pleasant to work with. And many people use a brush to apply the paste to the cotton wool. I find it convenient to use my hands rather than a brush, but this is more convenient for others.)
First, I smeared the entire workpiece with paste, then applied small pieces of cotton wool and again paste on top of each new piece. And smooth, smooth, expel all the air.


Dry cotton wool is very sticky to your hands. You just need to get used to it :) And we work on the face, make a nose with the help of stacks, and press through the eye sockets with a stack and a ball. Add you to the back of the head, tummy, and heels. Until you are happy with the result. The activity is very exciting!
We send it to dry. Just on an oilcloth (not on a radiator!), but for example, on a windowsill. We use the same principle to make the rest of the blanks.


In the evening I finished all the preparations and laid them out to dry overnight. The next day we begin sculpting the details (collars, skirts, cuffs, etc.) This is what the kids look like at this stage.


And here he is already smart and with a collar! After all the children are dressed up and decorated, we send them out to dry again.
The next day everyone was dry and ready to “live up.” Now you can start painting.
Since the cotton wool becomes wrinkled when it dries, and I didn’t insert plastic faces, I’ll have to straighten them out a little and make them prettier. To do this, I covered the faces with acrylic paint in several layers.


Then you can paint the figures with watercolors and acrylic paints.<
After everything has dried, lightly touch everything with a brush with glue (PVA) and sprinkle with dry glitter (glitter).
To prevent our sparkles from flying off, I sprayed everything on top with varnish. (Spray cans will do; I had hairspray.)
These are such elegant and shiny children:) Now it’s time to think about how they will hang on the Christmas tree.


My toys turn out to be quite strong and hard, so we take an awl and make a hole for the rope.
Well, now let's see what happened! I think these kids are very smart :)
Now I’ll show everyone separately, and then everyone on the Christmas tree!


First cockerel! The Year of the Rooster is just around the corner :)


Bunny.


Well, the photo "Guys on the Christmas tree"

That's all:)
Many people ask, is it difficult? I answer, if you are interested in this activity and like it, then it’s not difficult! :)
I will be very glad if the experience I have acquired becomes useful to you!
Content
The magical holidays are getting closer and closer - New Year and Christmas! If you want to surprise your loved ones with something unusual and beautiful, made with your own hands, then now is the time to start making papier-mâché snowman and penguin figurines.
What is papier-mâché?
This technique originated in Ancient China. Most often it was used to make pads and helmets. Soon it moved to France and acquired its current name, which translated into Russian means “crumpled” or “chewed paper.” In France, using the papier-mâché technique, they began to make interior items: figurines, vases and even furniture. Currently, papier-mâché is called not only the technique, but also the products made by this technique, and the mass itself - the basis for the manufacture of figures and objects.
Papier-mâché has become widespread in props used in theatrical productions, as well as in the manufacture of decorative items for interior decoration. In addition to vases, figurines, furniture, you can also make carnival masks, plates, beads, all kinds of animals, birds, dolls, Easter eggs and much more from papier-mâché. You can’t even imagine how beautiful products can come out of a dirty, unshaped lump that is unpleasant to the touch and appearance, in the hands of a professional!
Papier-mâché techniques
There are only three of them, but most often in everyday life craftsmen usually use two.
Layering method
Layer-by-layer pasting of a form or workpiece with small fragments of torn paper. If you plan to remove the mold from the product, then grease it with vegetable oil or Vaseline, and if you leave it, grease it with glue. As a form, they take, for example, a plate, vase or jar with the shape of our product molded from plasticine, or a balloon of a suitable size, and so on.

Torn paper is placed on the mold, coated with glue, a piece of paper is applied again so that its edges extend beyond the previous piece, coated with glue, the next one is placed and several layers of paper are similarly applied to the mold, it is better if there are 5 or more layers to give the product strength . Each piece of paper is carefully smoothed with your fingers so that creases and folds do not form. After applying several layers, the product is dried. Typically, this technique is used for round hanging forms and carnival masks.
Modeling
Modeling a product from a viscous mass resembling dough allows you to apply the mass to a mold and fill the molds with it. To prepare the dough, paper in any form (toilet paper, cardboard, newspaper, egg rack) is soaked in boiling water, squeezed out, grated and diluted with glue to the desired consistency. When sticking to the mold, the mass is smoothed with a knife or palette knife, relief is made on the raw dough, and dried.

After drying, the mold is removed, and the workpiece is primed and painted. If desired, to achieve impeccable smoothness, the product is treated with sandpaper, re-primed, and then painted.
In our master class we will make a snowman and a penguin using the layering method. A burnt out or new incandescent electric lamp will serve as a formative basis.
What do we need for work?
- a lot of paper
- PVA glue,
- wallpaper glue or paste,
- brush,
- acrylic paints,
- incandescent lamp,
- stationery knife,
- a couple of small branches,
- a small piece of red fabric,
- felt or craft foam in orange and black.
Making a snowman
- We glue small pieces of paper in 5 or 7 layers onto an electric lamp and wait for it to dry.
- To give stability to the figure, we make the legs from foam plastic and glue them using the same technique, and if you want to hang the toy on the Christmas tree, glue it with a strong thread.
- We paint the blank with white paint, draw eyes and a mouth.

- We also draw buttons on the stomach or use any available material, including black colored paper. To make the snowman look more festive and elegant, eyes can be glued on purchased ones, and buttons can be made from black sequins.
- We cut off a nose suitable for our snowman from felt or craft foam and glue it to the head.

- Take a red piece of fabric and cut off a piece of suitable size for the hat. We sew or glue its side surfaces to form a cylinder. Cut the top edge into strips. It is important that the fabric does not fray. We tie the cap with a narrow strip of red fabric just below the cut strips - we get a tassel on the cap.
- For the scarf, cut off a long, not wide flap, the ends of which are cut into “straws” similar to the brush of a cap. We tie a scarf around the snowman's neck, tying it to the side.

These papier-mâché Christmas decorations are very cozy and pleasant to the touch. Making them is not difficult, but the process takes a long time. Children don't like it. But this is even beneficial for busy adults. Today we soaked the trays (2 minutes), tomorrow we kneaded the dough (say 15 minutes), then molded them, and you can decorate them slowly in the evenings - for some reason, preparing for the holidays is much more interesting than celebrating.
You need paper trays for eggs, paste, PVA glue. For decoration - corrugated paper, gouache, PVA, starch, semolina, wire.
You need to buy a large container of PVA at a hardware or construction store - it takes a lot.

Semolina crumbs. Semolina can be glued on and then painted. Or prepare in advance as follows. Pour a few tablespoons of semolina into the frying pan and stir-fry. When the color changes, put some in a separate container. This is how we get different shades of brown. 
Now about the stalemate.
Pat is a mixture of starch, PVA glue and gouache. It is used to make the stamens of the flower artist.
Pat will replace you with chocolate glaze, mushroom or apple peel. You can also use it to make cherries. You need to wrap cotton wool with PVA around a wire, form a berry, dry it and cover it with a mat. Can be done in two layers. If you need shine, then coat the top with more varnish. 

How to cook.
Pour starch into a small(!) container and add PVA. Mix and achieve the desired consistency by adding PVA - if you need it thinner, or starch - if you need it thicker. We tint with gouache. It’s better to take the container with a lid so that you don’t have to use the whole mixture at once.

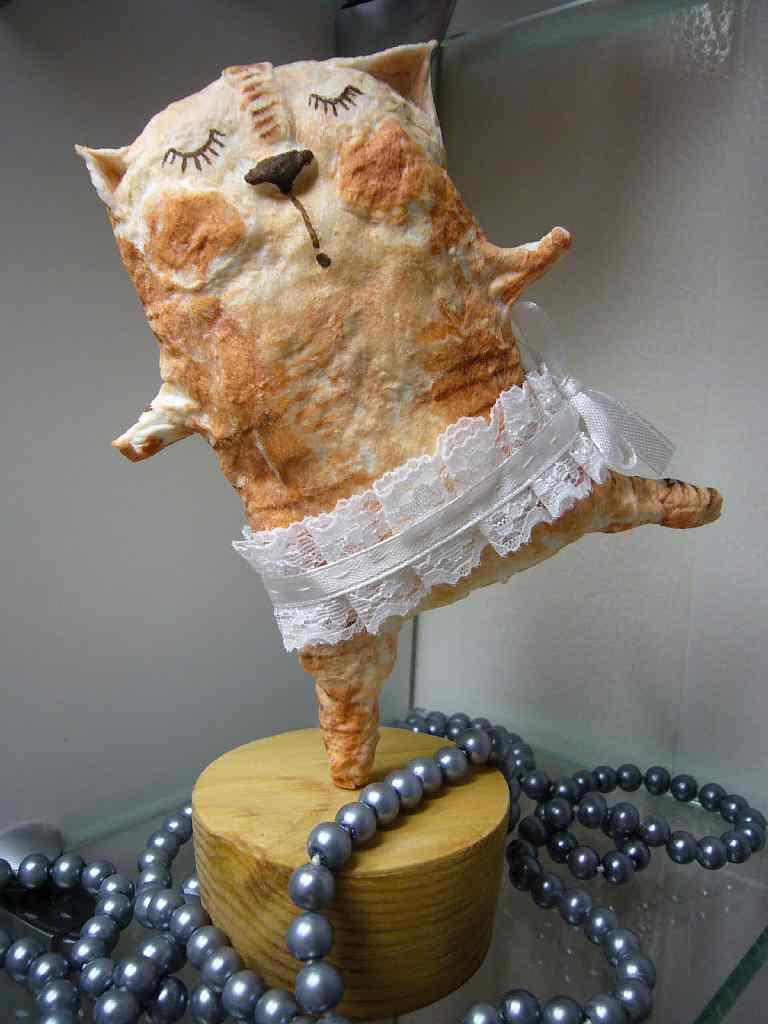
This is how the workpiece turns into an apple. Let's paint it with a stalemate. The tail is made of wire wrapped in crepe paper (we coat everything well with PVA). 

Bon appetit creativity!
The New Year is a reason to show your talents and start making gifts. Before the main winter holiday, stores are filled with shiny New Year's decorations, but making toys yourself is more enjoyable and interesting. Papier-mâché is the right material for the job. Even adults and children who are just beginning to do needlework can handle the technique.
Step-by-step master classes will tell you how to build Christmas tree toys from papier-mâché and give ideas for winter creativity.
It’s easy to make a snowman since it consists of balls and has a cone-shaped shape without thin parts.
Crafts are made in different ways depending on the base. For the frame, ready-made objects (balls, jars) or a figure sculpted from plasticine are suitable. The product will also be made from papier-mâché or cotton wool.
Snowman made of paper plastic
Let's consider different options for making papier-mâché. The mashing technology consists of covering a suitable base with strips of newspaper. Old balls are suitable for a snowman (you can use balloons). What else is needed to create a toy by machining:
- plasticine;
- newspapers;
- PVA glue;
- capacity;
- water;
- scissors and stationery knife;
- fat cream;
- acrylic paints and brushes;
- items for decoration (scarf, bucket, eyes).
Description of work: tear (exclusively tear!) newspaper into small strips and coat the ball with cream:


Wet the strips in water and cover the surface of the ball. Make layers 2 and 3 in strips soaked in glue and let dry. Continue applying layers (10-15 in total). Dry periodically in a warm place (drying may take 12-24 hours). Cover the remaining balls. Make balls for the “hands” and a cone for the nose from plasticine, and then cover the parts with newspapers (steps 1-6):


Wait until completely dry and carefully cut the pieces with a knife:


Connect the halves with glue and secure the seam with several layers of newspaper. Cut off the top of the two bottom balls and glue the entire structure (to make the product heavier, glue a weight, for example, a toilet paper roll, to the bottom of the balls). Cover the papier-mâché with white acrylic paint and let dry. Decorate the sculpture:

Using this principle, cover a snowman made of plasticine. Before applying layers, it is recommended to lubricate the base with cream.
Snowman made of paper pulp
This mass can be purchased at a hobby store (sold dry) or made with your own hands from a mixture of toilet paper, egg cells, water and glue. The preparation process includes the following steps: tear paper into a container, pour boiling water over it and leave for a day. Mix with a mixer, squeeze out the moisture, dry, add PVA glue to the paper and knead the “plasticine”:


Now you can sculpt a snowman from papier-mâché. For this you will need:
- cardboard;
- cotton wool;
- PVA glue;
- pencil;
- scissors;
- acrylic paints and brushes;
- suitable fabric for a scarf.
How to make a snowman step by step: roll three balls of different diameters from the mass and place the blanks on top of each other to evaluate the general appearance of the future toy. Separate the balls and leave to dry, glue them together:


Cut out the stand (legs) from cardboard and glue the blank onto it. Tear two pieces from the cotton wool, roll them up and connect them to the “legs”:


Coating the sculpture with glue, wrap it with scraps of cotton wool to completely hide the gray papier-mâché, cut out “handles” from cardboard, and twist a carrot from the mixture:


Decorate the parts and glue them to the dried toy (“handles” secured with cotton wool) and paint the snowman, draw a mouth and eyes. Tie a scarf cut from fabric around your neck:


To save weight and add volume to the snowman, it is recommended to use foil as a base for papier-mâché. Roll balls from crumpled foil and press them a little on top and bottom to make it easier to glue together.
Video: Vintage Snowman
Snowman papier-mâché made of cotton wool
Instead of papier-mâché, try using cotton wool. To do this, use soapy hands to form two balls. When the blanks are dry, they are opened with a PVA solution and left to dry. The nose is rolled out of cotton wool on a toothpick, covered with glue and then paint. Beads are glued on as eyes and mouth. The parts are connected using a toothpick and glue. All that remains is to stick the branches-handles and dress the snowman in a hat and scarf:

To make other New Year's toys (bunnies, bears, cats), it is also better to use modeling. Flat figures do not require a special base: papier-mâché can be applied along the contours of the template on a modeling board or piece of linoleum. For three-dimensional figures, foil, plasticine, and plastic bottles are used as a model. In order for the figurine to hang on the Christmas tree, you should not forget about the wire loop; attach it to the toy while working:

Snow Maiden and Santa Claus under the Christmas tree
The main characters of the New Year are made more complex due to the anatomy of the figures. Despite the lush fur coat, long beard and rounded mittens, Santa Claus requires drawing of details - face, hands, collar, hat. It will take skill to portray a girlish braid, a slender figure and the face of the Snow Maiden. Naturally, the mashing method is not suitable for such delicate work.
As a basis for a papier-mâché sculpture, take a cone made of foil, plasticine, or cardboard. A small plastic bottle or its neck will also work. For the papier-mâché sculpting tutorial you will need the following materials and tools:
- base (take cardboard cones of different heights);
- modeling mass;
- plates or stands for sculptures;
- stacks;
- cardboard;
- sandpaper;
- acrylic paints;
- brushes;
- decorative details (sequins, sparkles, ribbons);
Step-by-step instructions: glue the cones or fashion them directly from papier-mâché and leave to dry. Using stacks and papier-mâché, we make large details - the head, the lapel of the fur coat, the sleeves (for the Snow Maiden’s thin neck, a long self-tapping screw is inserted into the cone):


Leave to dry and add new layers, sculpt a hat, collar, strengthen the shrunken parts:


The structure dries, and then layers are applied again, correcting the dried and deformed elements and we sculpt the Christmas tree in parts, which we then connect together:


We cut off one side of the Christmas tree and “hand it over” to Santa Claus.
After drying again, we add layers, sculpt a nose, face, beard, hair. We cut out a kokoshnik from cardboard and glue it to the Snow Maiden, “weaving” a braid. We evaluate the dried figures, eliminate the shortcomings, leave them to dry, go over the sculptures with sandpaper and cover the characters with white paint and decorate them:


We decorate the toys: decorate the kokoshnik with sequins, the lapels with sparkles, draw expressive eyes and cheeks, sew a bag with toys, etc. To decorate a fur coat, use sequins in the form of snowflakes and stars. The final stage is coating with acrylic varnish:

You can “sculpt” figures from cotton wool. A wire frame is ideal for this method. In addition to thick wire you will need:
- starch (1 tbsp);
- stand (board, plywood, foam);
- cotton wool;
- PVA glue;
- doll or figurine with a face;
- corrugated paper;
- paints (acrylic);
- brushes;
- glitter;
The toy is made step by step: twist a frame from wire. Dilute the starch with a small amount of cold water, stir, add boiling water to obtain a homogeneous mass without lumps and disassemble the cotton wool into strips, then cover them with a thick ball of paste and begin to “bandage” the frame (apply several layers, highlight the boots, waist) and leave to dry.
With the New Year holidays approaching, I want to add a little fairytale and magic to my life. To diversify your preparations for the New Year and Christmas, surprise your loved ones, and at the same time create a magical atmosphere in your home, you can create New Year's papier-mâché products.
The first unusual works of this technique appeared in Ancient China, and it was used in the production of protective headgear. Soon the French began to use it in their country for the manufacture of decor and even furniture, where the name “Papier-mâché” originated. Translated from French, the technique of making objects is translated as “crumpled paper.”

Handmade crafts look very original, especially antique ones. In addition, they are quite simple, and even children can cope with their manufacture. The papier-mâché technique is as follows: a certain shape is taken as a basis, onto which torn paper must be applied in layers. The paper is placed in such a way that each piece rests on the previous one. Each layer of the figure must be carefully coated with glue, and the paper must be carefully smoothed out so that there are no wrinkles. To create a craft, as well as strengthen its strength, you need to make at least 5 layers. Upon completion of the work process, the product must be thoroughly dried.
Hanging figures for the New Year, such as Christmas tree decorations, a New Year's or carnival mask and other handmade products, will amaze both children and adults.
New Year's toys and papier-mâché crafts are especially original, and a New Year's tree with such decorations delights with its uniqueness. Under the green beauty you can put a molded Santa Claus, a New Year's house, a symbol of the New Year and other winter-themed figures.
Master class on working with papier-mâché (video)
Papier-mâché Christmas decorations: a fun decoration
What could be more interesting than receiving gifts? Of course, cook them! And it’s even nicer when souvenirs and Christmas tree decorations are made by yourself.
To make original or vintage toys for a papier-mâché Christmas tree you will need:
- A mass of several rolls of toilet paper;
- Work surface;
- Paint with brushes;
- Forms;
- Sandpaper.

The main material for the craft is paper pulp made from toilet paper, glue and glycerin. If you have it, you can start creating crafts.
Take the necessary mold, which can be anything, and fill it with mass. You don’t have to use the mold. In this case, it is necessary to squeeze the mass in your palms as hard as possible to keep it strong. In the process of making toys, the specific shape of the intended product should be given.
An excellent option would be to create animals, cones, and Christmas balls. After modeling is completed, the products need to be dried for two to three days.

To make the surface of the resulting figures smooth, you should rub them a little with sandpaper. Smooth products are not only pleasant to touch, but also work with paints in the future becomes several times easier.
The final stage is painting the elements with acrylic paints. You can invite children to color the products - there will be no limit to their delight! The resulting balls or other standard shapes can be further decorated with ribbons, beads and other small details. The papier-mâché Christmas decorations are finished, and the mood is already New Year's!
New Year's mask for a festive evening
A papier-mâché mask is made slightly differently.
To begin with, take a model of the future mask, cover it with Vaseline and paste it with pieces of paper according to the following procedure:
- Standard papier-mâché technique;
- The first layer is covered with glue;
- Pasting with thicker paper, smeared with thick glue;
- Papier-mâché technique made from plain paper;
- Pasting with pieces of cotton cloth;
- Repeating the papier-mâché technique from plain paper;
- Pasting again with thicker paper;
- Pasting with white thick paper or white cloth
All layers must be done carefully, carefully smoothing out the folds and releasing any air bubbles that have formed so that the mask is even. Next, the product is dried well for more than three days.

After the mask has dried, we begin to decorate it. You can cover the workpiece with any fabric, but it is best to give preference to stretch fabrics to avoid wrinkles. The slits for the eyes must be made with a small allowance to turn the edges inward. The inside of the mask should also be covered with cotton cloth. The last stage of making the craft is the most interesting.
The finished mask is decorated based on imagination. You can use anything: beads, feathers, sequins, braid and much more. A homemade mask is highly valued at any holiday.
Cotton papier-mâché and its simplicity
How can we cope without Santa Claus in the New Year? And if the character is made with your own hands, then the feeling of celebration is increased several times.
To create a hero from cotton wool and papier-mâché, you will need wire or a plastic bottle, which will be used for the frame of the product, cotton wool, thread and PVA glue. You can mix a paste of flour or starch with your own hands, but with glue the work is simplified.

To begin with, take a wire and twist it in the form of a human silhouette, onto which dry cotton wool will be molded in layers. After applying several layers, the cotton wool on the frame must be secured with threads. Now the main stage of work begins. Cotton layers need to be glued onto the frame of the craft. To do this, you need to thinly divide the cotton wool, soak it well with glue and apply it to the figure. To make the surface smooth, you can paste the figure with thin paper. After forming the silhouette of Santa Claus, you need to start sculpting his face and other small details. The sculpting of the New Year's guest is complete!
The time to dry the figure is calculated based on its size, but not less than 3 days. The last stage is New Year's coloring of the product with acrylic or other paints.
How to make crafts using the papier-mâché technique look beautiful?

To do this you need to know little tricks:
- Do not dry figures on a radiator or other heaters to avoid cracks;
- You can give the product ideal evenness and smoothness using sandpaper or additional layers of glue;
- To preserve the durability of the craft, at the end of the work it is necessary to coat it with varnish;
- Cotton fabric well soaked in an adhesive solution will help give the product strength.
How to make a papier-mâché toy with your own hands (video)
Not everyone can practice papier-mâché. To work with your own hands, you should have such traits as patience and perseverance. And for craftswomen who cannot imagine themselves without their favorite craft, and whose workflow skills for making original products have long been honed, crafts can bring good income.
Examples of New Year's toys made of papier-mâché (photo)